How to Create and Edit Videos in Canva

Video editing is demanding and often limited to hardware and software. But it doesn’t have to be this way. Today, you get a handful of feature-rich and lightweight video editors available online. Among them, Canva is quickly becoming everyone’s favorite choice as it offers enough tools to edit your videos.

Getting dedicated hardware and software to edit videos is expensive and has a steep learning curve. However, if you’re an aspiring YouTuber or a hobbyist, you can make professional-looking videos using Canva’s feature-packed video editor. We’ll explore Canva’s video editor to create and edit videos. So, let’s get started.
How to Crop, Trim, Combine Videos in Canva
First, let’s see how you can upload your video to start editing it in Canva.
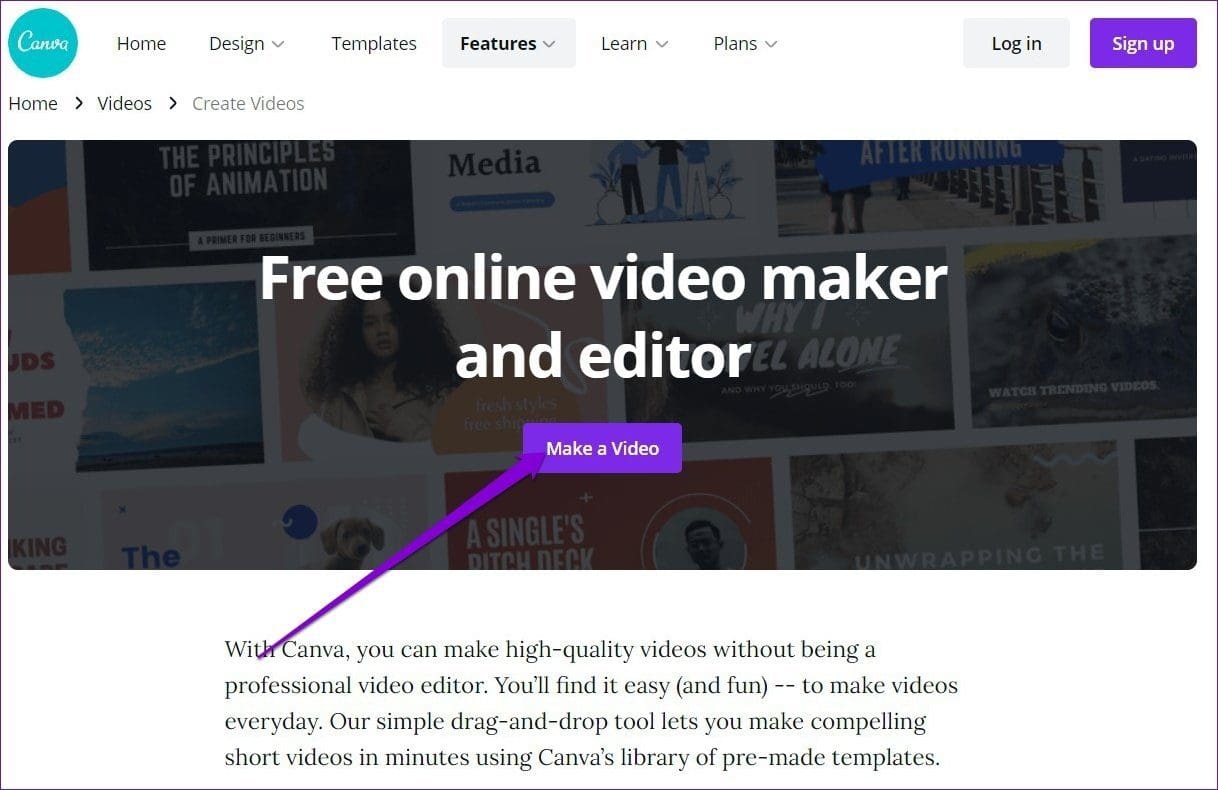
Step 1: Open up your web browser and navigate to Canva’s video editor. Now click on the Make a Video button.
Step 2: Inside the video editor, switch to the Uploads tab and click on the Upload media button to upload your video from PC.

Alternatively, you can also use the three-dot menu to upload your video directly from other platforms such as Facebook, Google Drive, Instagram, or Dropbox.
Step 3: Once you’ve uploaded your video, you’re all set to edit in Canva’s video editor.

Split Clips
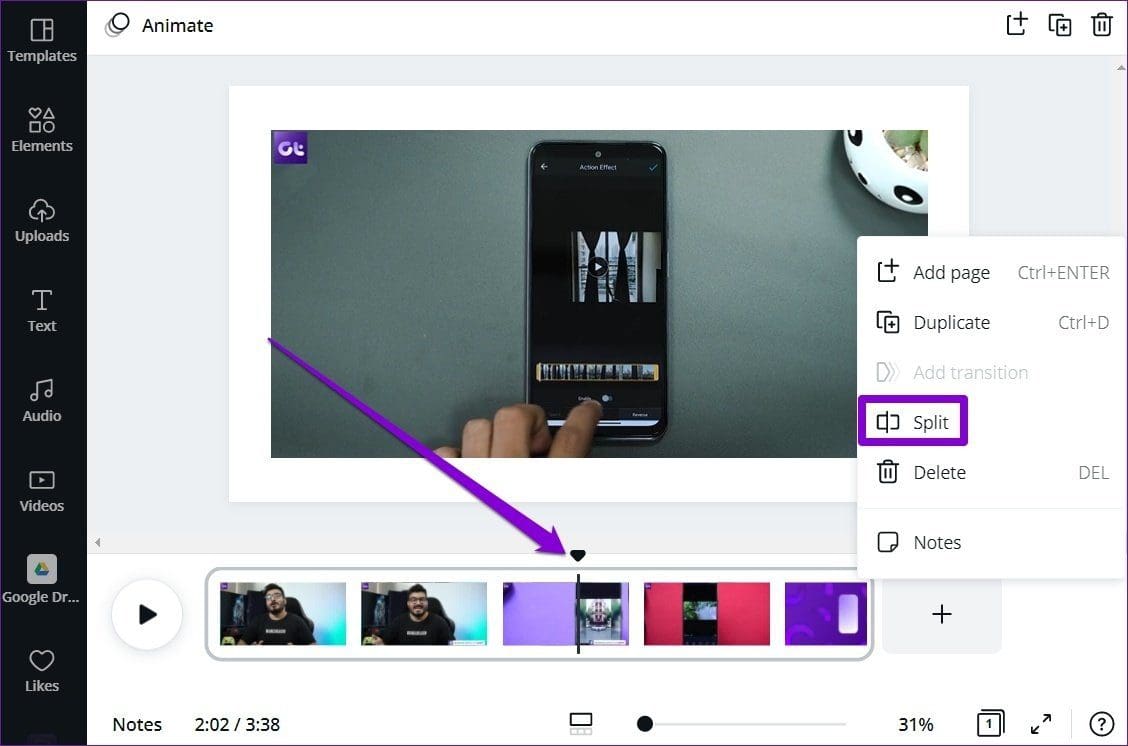
You’ll find that your entire video is shown as a single clip in the timeline. You can divide your video into various parts and edit each one of them separately.
To split your video, move the cursor to the part from where you wish to split the video. Now right-click anywhere on the timeline and choose Split.
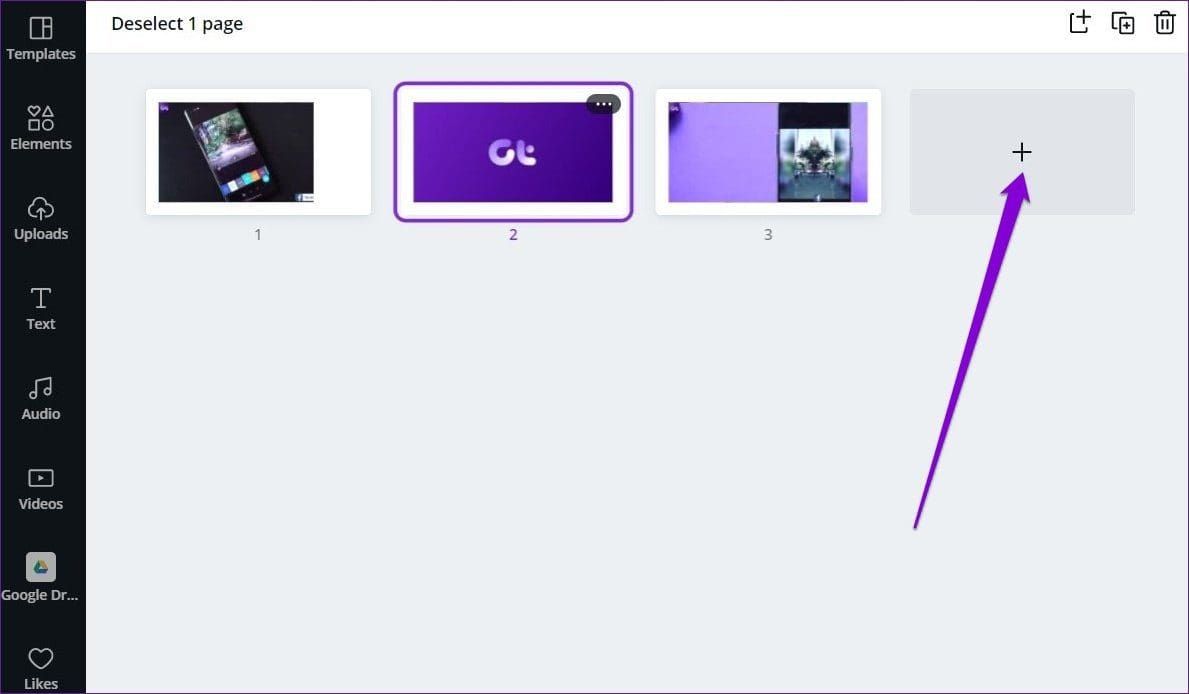
Additionally, splitting your video into parts also allows you to change the order of the clips. You can view all your clips in the Grid view and change their order from there.

To add more clips and images to your video, click on + Add page button.
Trim Videos
Aside from splitting, you can also easily trim your clips in Canva. Here’s how.
To trim your video in Canva, select the video and click on the cut icon in the upper-left corner.
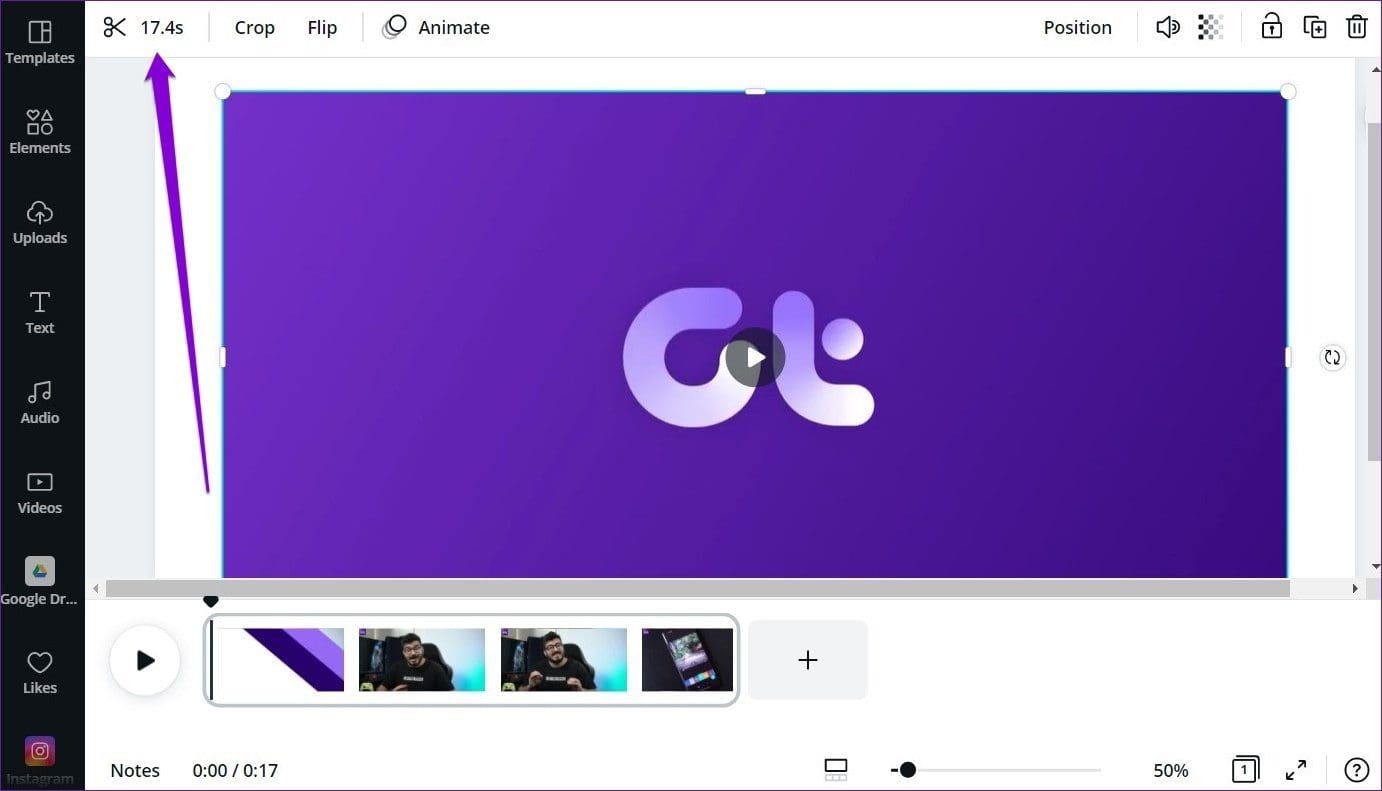
Next, use the two sliders at the top to select a portion of the video. Lastly, click on Done to save your trimmed video.

Crop Videos
Similarly, you can also crop your video in Canva to your preferred aspect ratio. To crop your video, select the video in preview and click on the Crop button in the top left.

Now crop the frame of the video just like you’d crop an image. Lastly, click on Done.
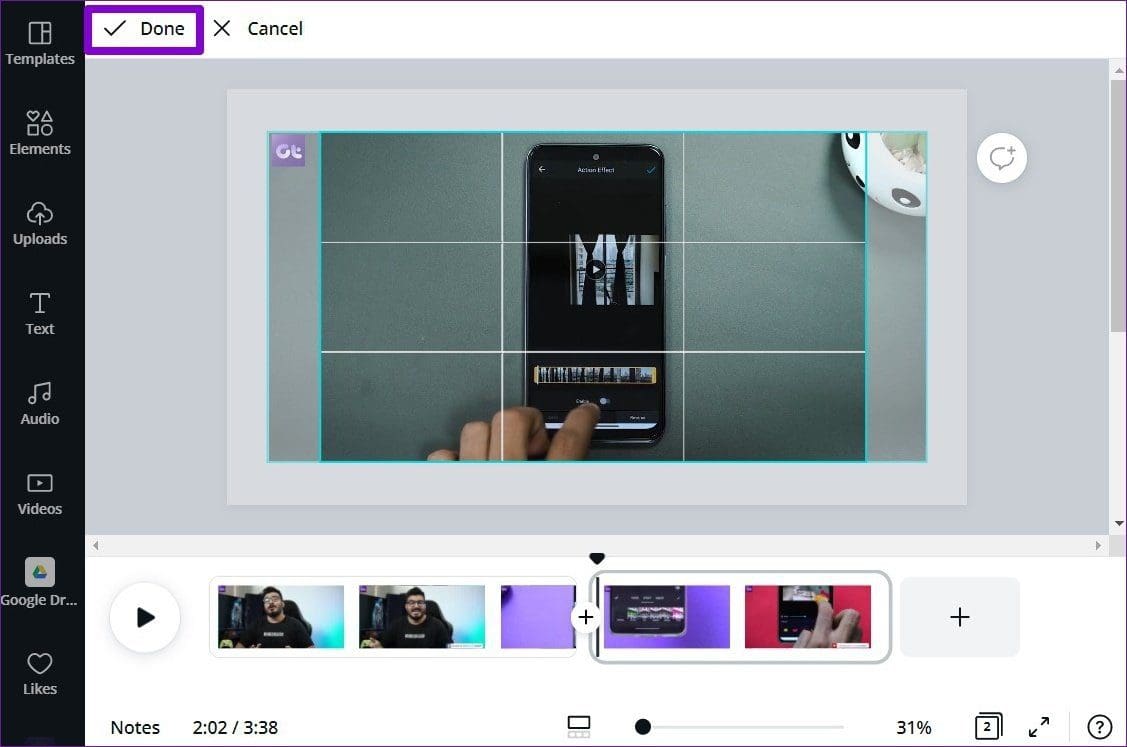
Note that the same aspect ratio will be applied to the entire clip.
How to Add Elements and Text in a Video
Apart from the basic editing stuff, you can also add elements and text to liven up your videos in Canva. Here’s how.
Use Elements
Step 1: Switch to the Elements tab on your left. You can explore Canva’s extensive library of various stickers, graphics, photos, charts, and more here. You can look for a particular element by exploring different categories or use the search option.
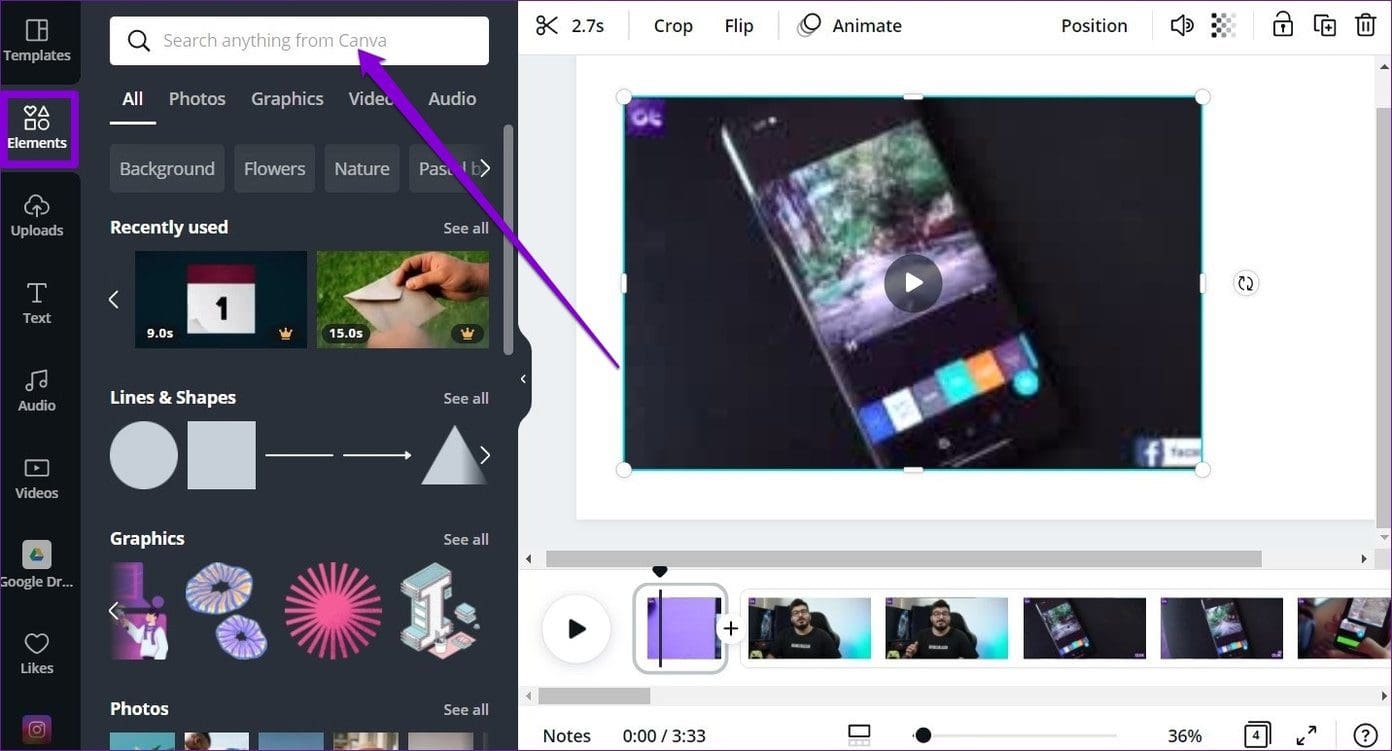
Step 2: You can insert any element from the library by clicking on it. Once added, you can move, resize, crop, or animate it as per your requirement.

The element you add to your clip will appear throughout the video. To remove the element from the video, select it and hit Delete.
Add Text on Video
With Canva, you can also insert text over your video to make it more descriptive. Here’s how.
Step 1: Switch to the Text tab on your left. First, select the type of text you wish to add.
Step 2: Next, you’ll have to choose a text style for your video.
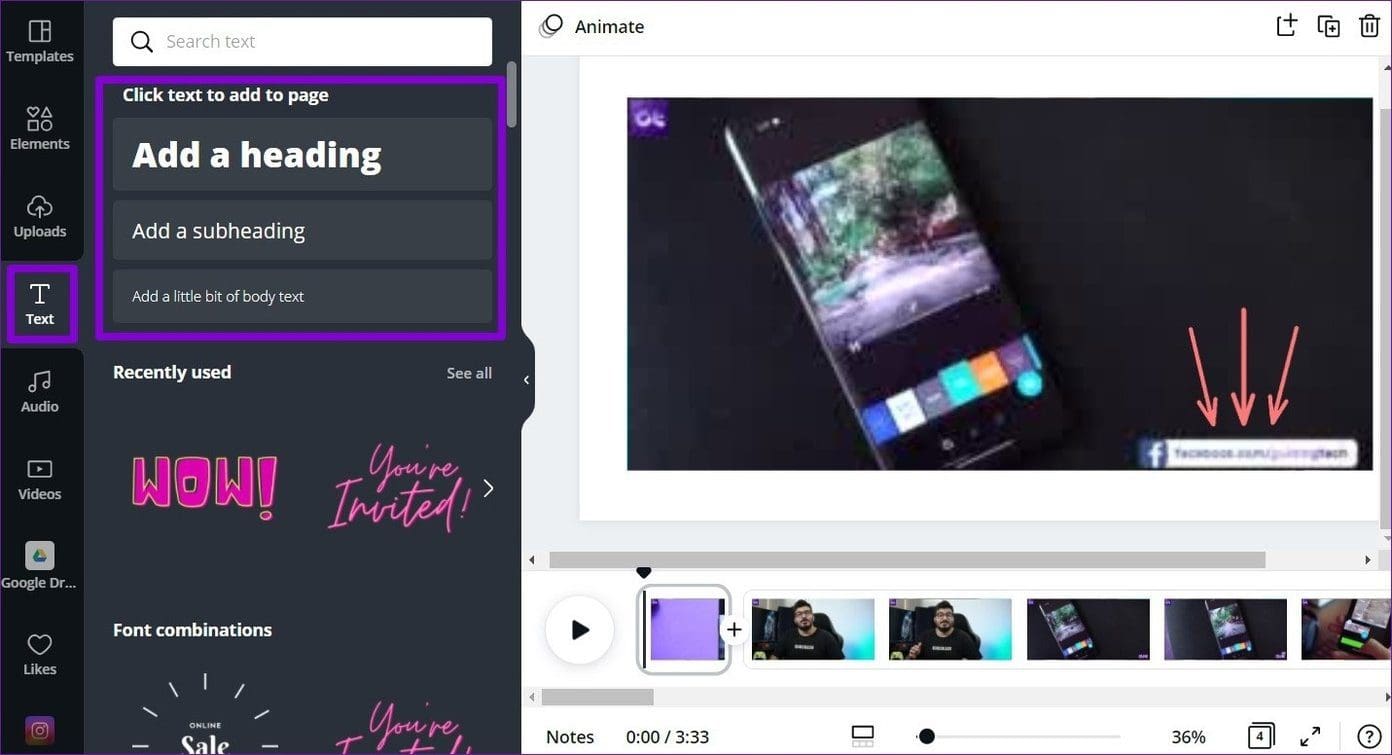
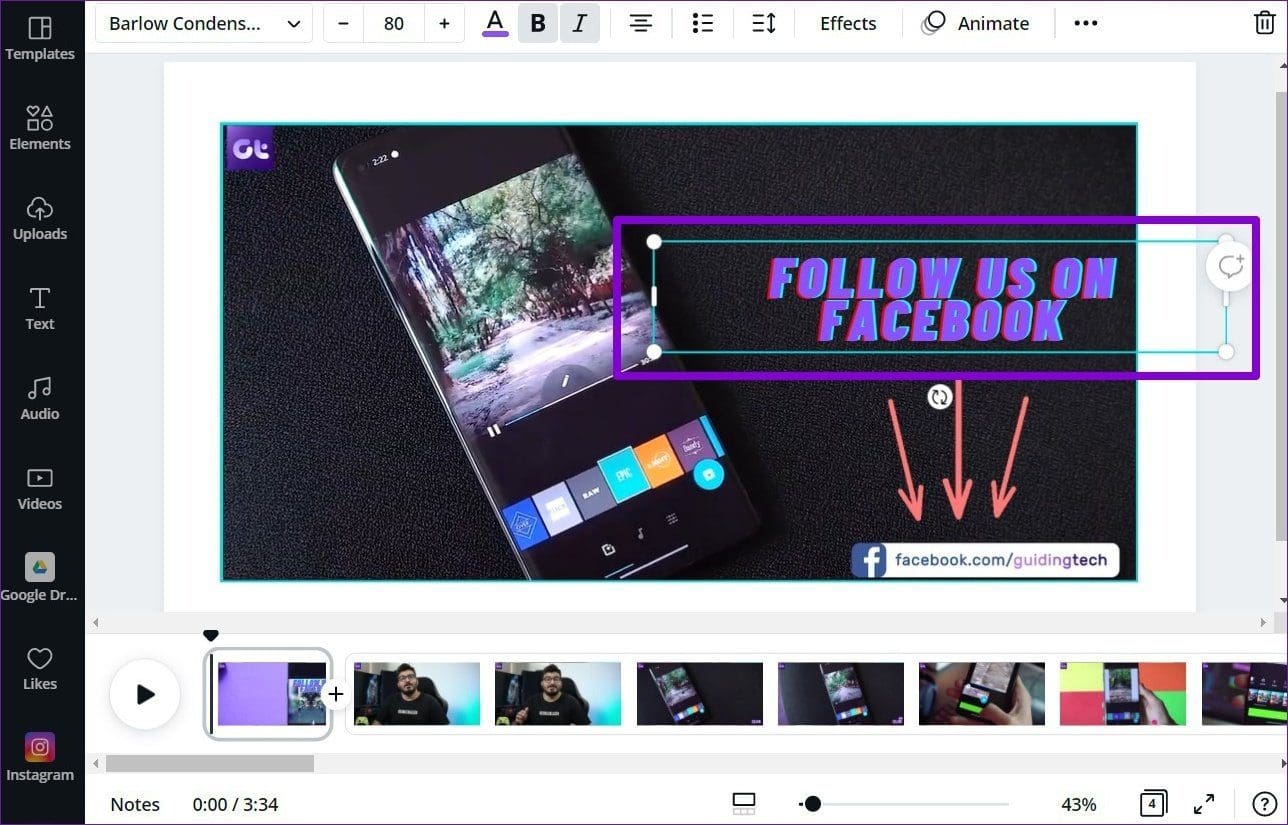
Step 3: Once added, you can edit the text inside the text box. Additionally, you can use the toolbar at the top to change font style, size, color, position, spacing, etc.
How to Add Effects and Transitions in a Video
Once you’re done with the basic editing, you can now add some extra flair to your video by adding effects and joining your clips with smooth transitions in Canva. Here’s how.
Apply Effects
Step 1: Select the clip from the timeline that you wish to edit and click on Animate from the toolbar at the top.

Step 2: Here, you’ll find various types of page and photo animations. You can preview each of them by clicking them.

Likewise, you can also add such effects to a particular element or text. To do that, select the element and click on the Animate option from the toolbar above.
Now on your left, you’ll find a few animations that you can apply.

Join Clips with Transitions
After you’ve edited all the clips in your timeline with the tools above, here’s how to join clips with various transition effects in Canva.
Step 1: Go to your video editing timeline, click on the + (plus icon) between the two clips, and select Add transition.
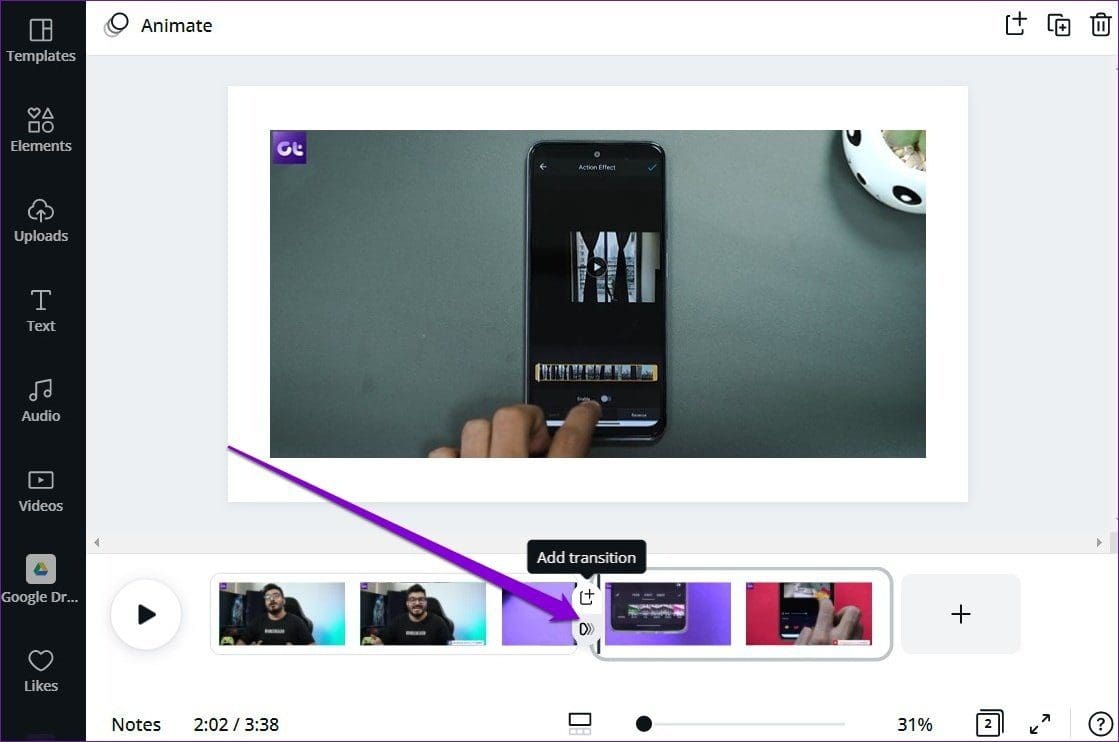
Step 2: Here, you can preview each of them by hovering your mouse over them. Select the one you wish to apply. Additionally, you can also tweak its duration along with its direction.

To add the same transitions to all of your clips, click on on ‘Apply between all pages’ button.
How to Add Background Music to Video in Canva
Apart from elements and effects, you can also insert background music of your choice into your video in Canva. Read on to learn how.
Step 1: Switch to the Audio tab on your left. Here, you’ll find a bunch of copy-right free audios that you can use in your video. You can also search for audio using the search box or the tags at the top.
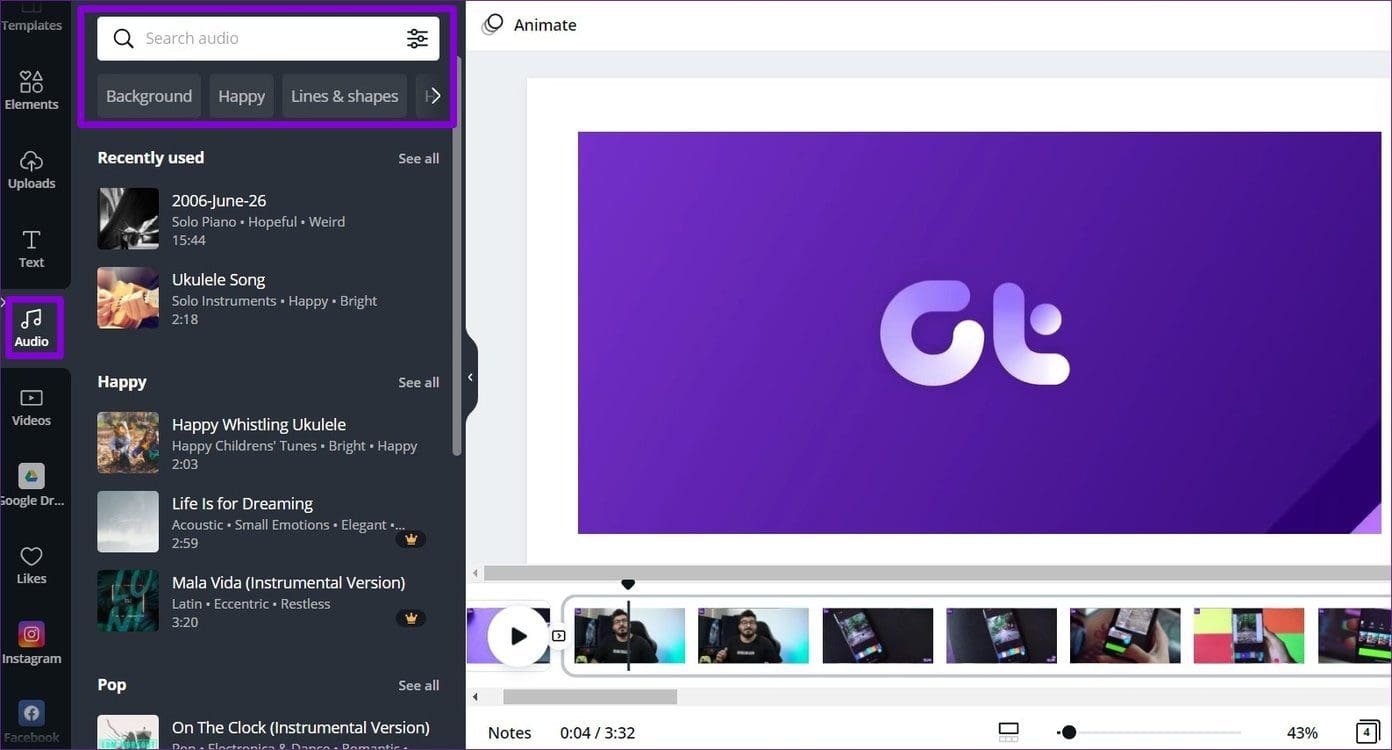
Step 2: To add a track to your video, simply drag and drop the audio to your video timeline.

Step 3: Once added, right-click on the audio to trim it, adjust the volume, or delete it from there.

Custom Audio Tracks
While Canva does offer copyright-free tracks, you can always choose a custom audio track that you’d like to use. Here’s how.
To insert custom audio, go to the Uploads tab on your left. Now click on the Upload media button to add your custom audio track. Alternatively, you can also record your audio in Canva by using the Record yourself button.

Once uploaded, you’ll find your track in the Audio tab below.
How to Use Templates to Create Video
If editing your video from scratch seems tedious, use the templates in Canva to automatically restyle your video with filters, music, and text styles. Here’s how.
Step 1: Switch to the Templates tab on your left. Here you’ll find its extensive library of pre-made templates. Click on the one you’d like to use.

Step 2: Once added, you can select and edit various elements of the template, including its background, text, size, animations, effects, and more.

How to Download and Share Video
After editing the video, you can preview it by clicking on the play button in the timeline. Once you’re satisfied with your creation, here’s how to download it.
Click on the download button in the upper right corner, select the file type as MP4 Video and select the pages you’d like to include. Lastly, click on the Download button to get your video.
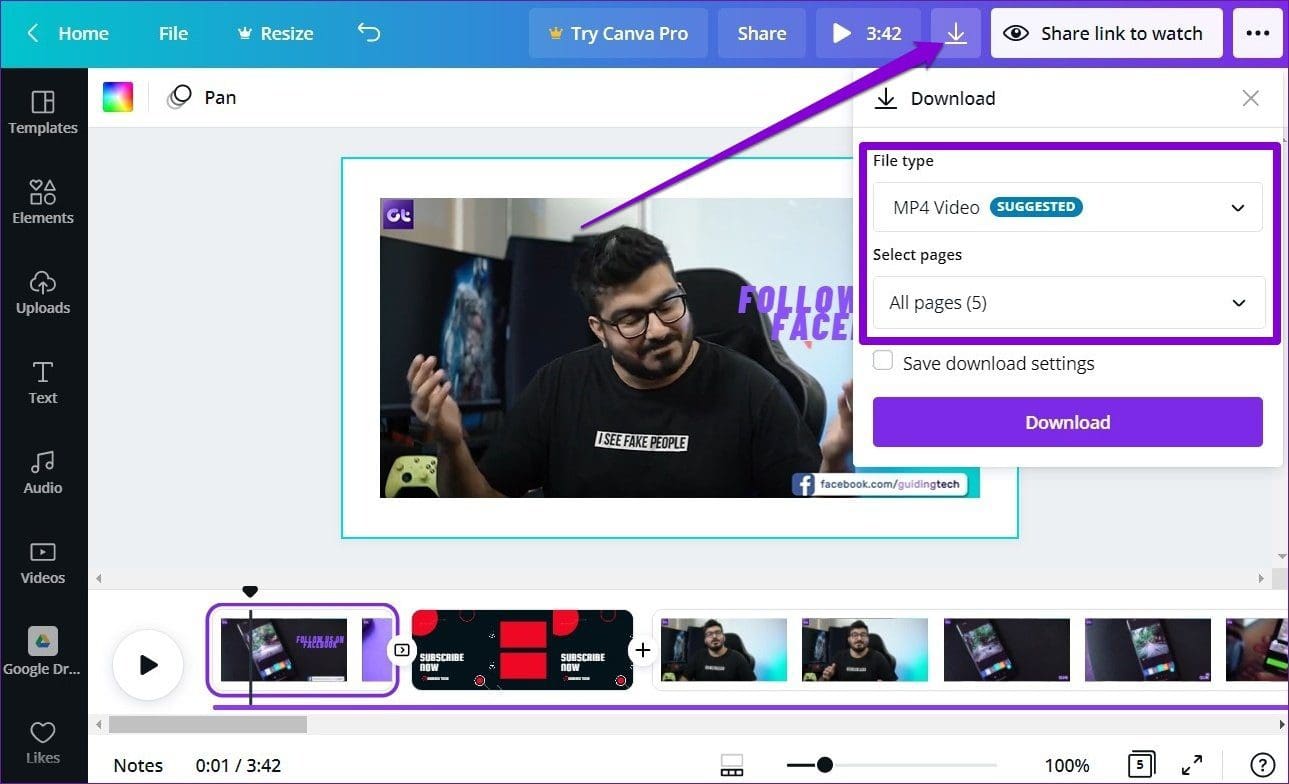
Wait for Canva to compile and download the video for you.
Editing Made Easy
Canva certainly shows real promise with its easy-to-use video editor. Plus, the ready-to-use templates and elements in Canva make creating and editing videos a breeze. So, what are you waiting for? Go on and start editing your videos already.


