Top 15 Tips to Edit Images in Google Slides

What would a presentation be without any images? Undoubtedly, pictures add more value and aesthetics to your slides. However, some users skip the idea of adding images as their pictures are unsuitable for slides. Some of the problems are that pictures need to be cropped or lack perfect brightness. Fortunately, you can perform a variety of image-editing tasks right within Google Slides. In this post, we offer you 15 tips to edit images like a pro in Google Slides.

This post lists the steps for Google Slides on the web. However, the tips would work on mobile apps as well. Further, most of the tips can be used in other Google Drive services, such as Google Docs and Google Drawings as well.
Excited? Let’s get started.
1. Resize and Rotate Image
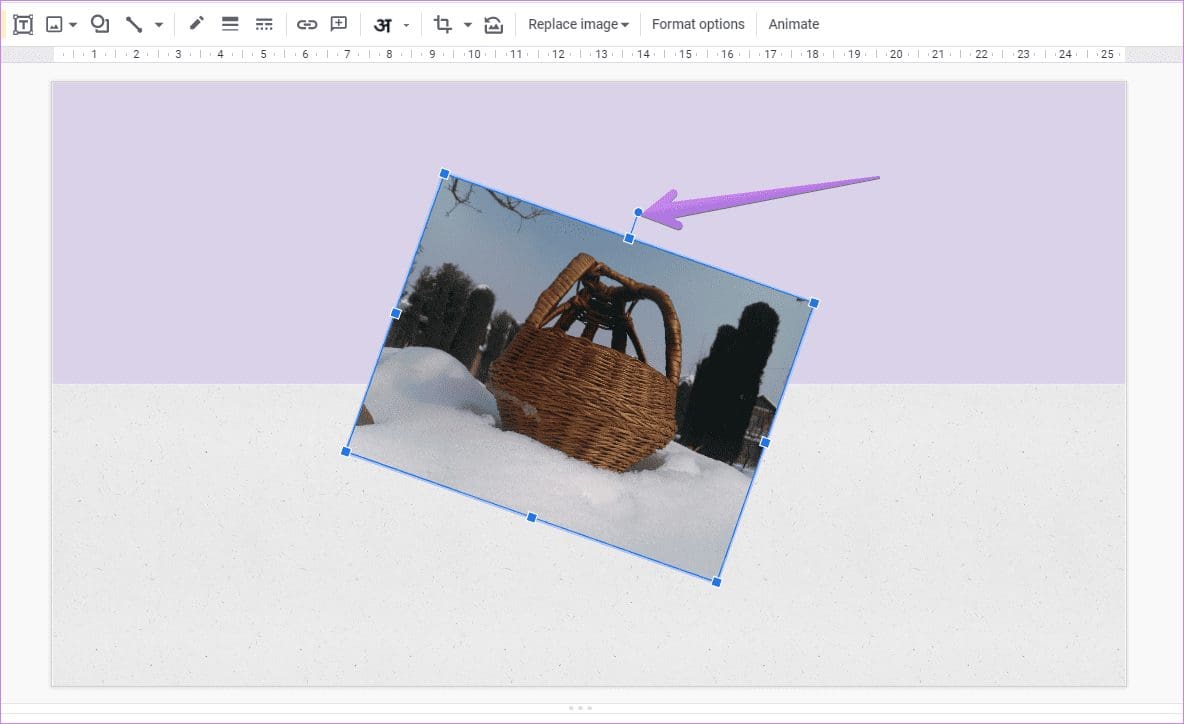
When you add an image to Google Slides, it will be used in its original size. So you might need to resize or rotate it.
To resize an image, click on the image. When the blue border appears around the image, resize the image by dragging it with the corner boxes’ help. You can use the tiny boxes available in the border’s center, but that will not maintain the aspect ratio.

Pro Tip: Find out how to resize images in bulk.
Similarly, to rotate an image, click on the image to select it. Then using the tiny circular icon at the top of the image, rotate the image. Alternatively, if you want to rotate an image by 90 degrees or flip horizontally/vertically, right-click on the image and select Rotate. Choose the appropriate option.
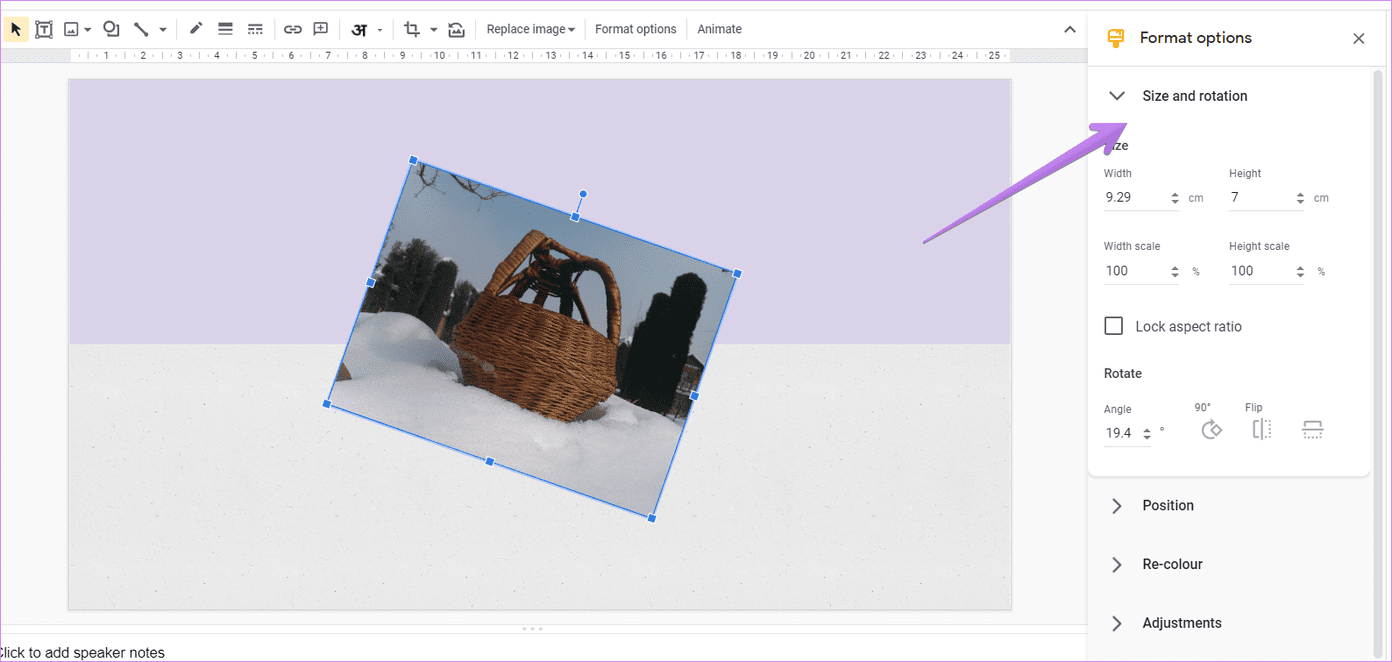
Further, you can manually set the image’s dimensions, rotation angle and even lock the aspect ratio. For that, right-click on your image and select Format options. A right sidebar will open. Click on Size and rotation to expand it. Then set the parameters according to your need.
Pro Tip: To change the position of an image, simply drag it. Or right-click on the image and go to Format options. Then manually enter the location of the image under the Position section.
2. Enable Alignment Lines
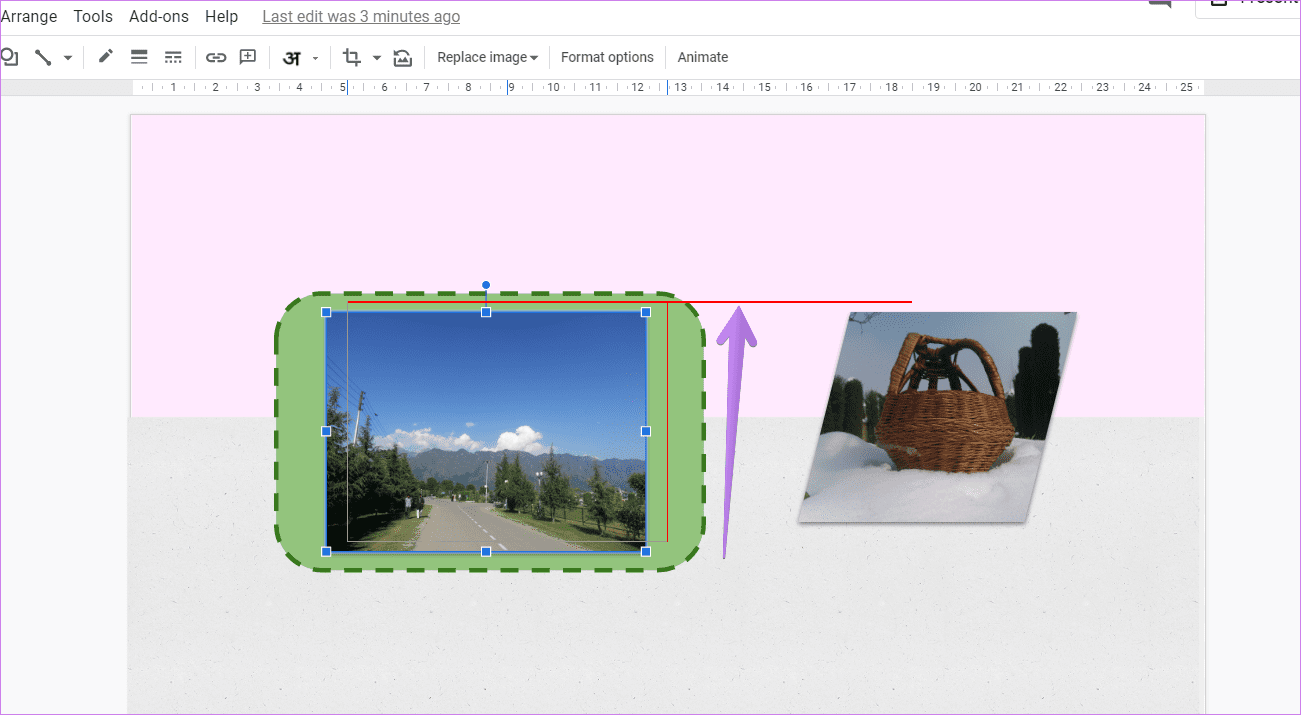
While aligning images, one isn’t sure whether it’s placed properly for other items. To make things easy, you can enable alignment lines. Those will guide you while moving your images.
To enable them, go to View > Snap to. Click on Guides.

Now whenever you move images, you will see red lines. Use those for proper alignment.
3. Crop Image
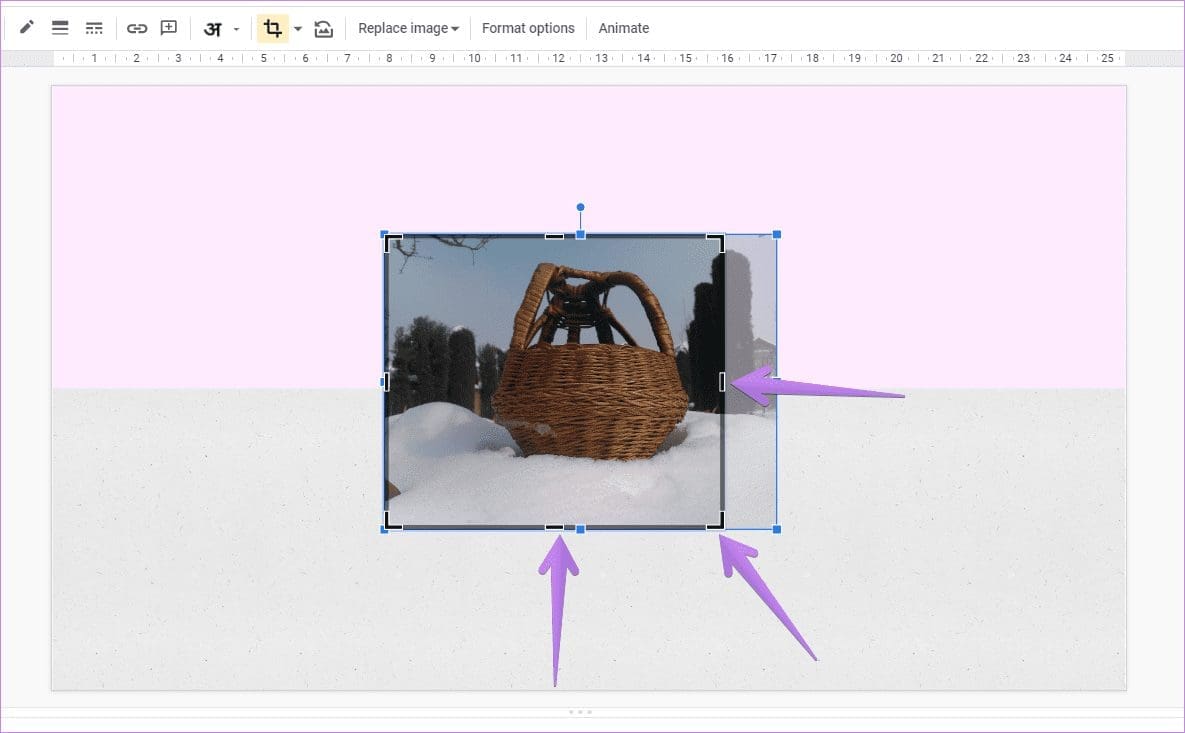
At times, your image might have unrequired portions. You can crop it directly in Google Slides. For that, click on the image and hit the Crop icon in the menu bar at the top. Alternatively, right-click on the image and select Crop image.

When the Crop tool is active, you will see a black border around the image. Using the slightly darker black bars, drag the image inwards to crop it as per need. Then click anywhere outside the image or press the Enter key on your keyboard to crop the image.
4. Mask Image
You can crop your image in various shapes in Google Slides. For that, click on the image first. Then click on the small arrow next to the Crop icon in the menu bar. Select the required shape. We have covered this tip in detail. Do check our post on how to mask images in Google Slides.

Tip: Don’t like the shape crop feature in Google Slides? Check five websites that let you mask your images in various shapes.
5. Adjust Image Transparency, Brightness, and Contrast
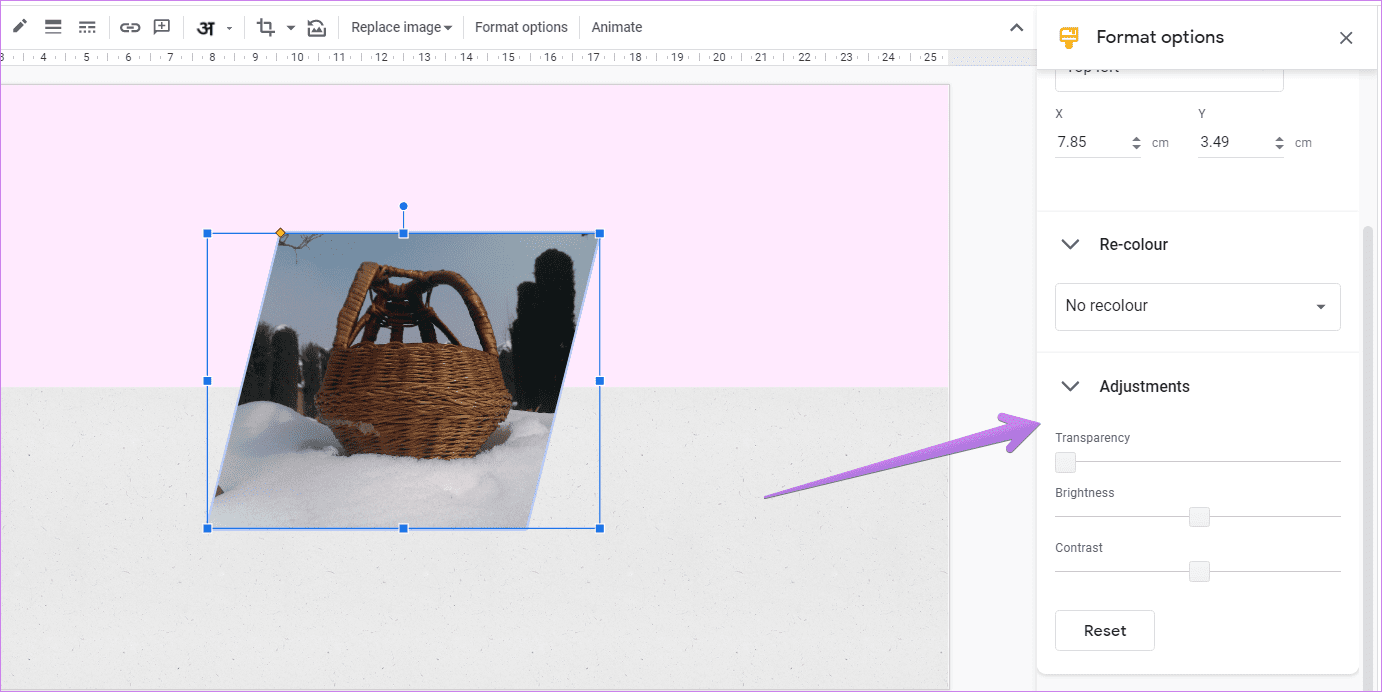
You can customize the brightness and contrast of your image in Google Slides. You can even make your image transparent by adjusting the transparency. For that, right-click on the image and select Format options. Expand the Adjustments section. Using the sliders, adjust available options.
6. Add Image Effects
Google Slides lets you re-color your image, add shadow, and create a reflection for your pictures. All three options can be accessed by right-clicking on the image and selecting Format options. You can customize the Drop shadow and Reflection parameters.

7. Layer Images
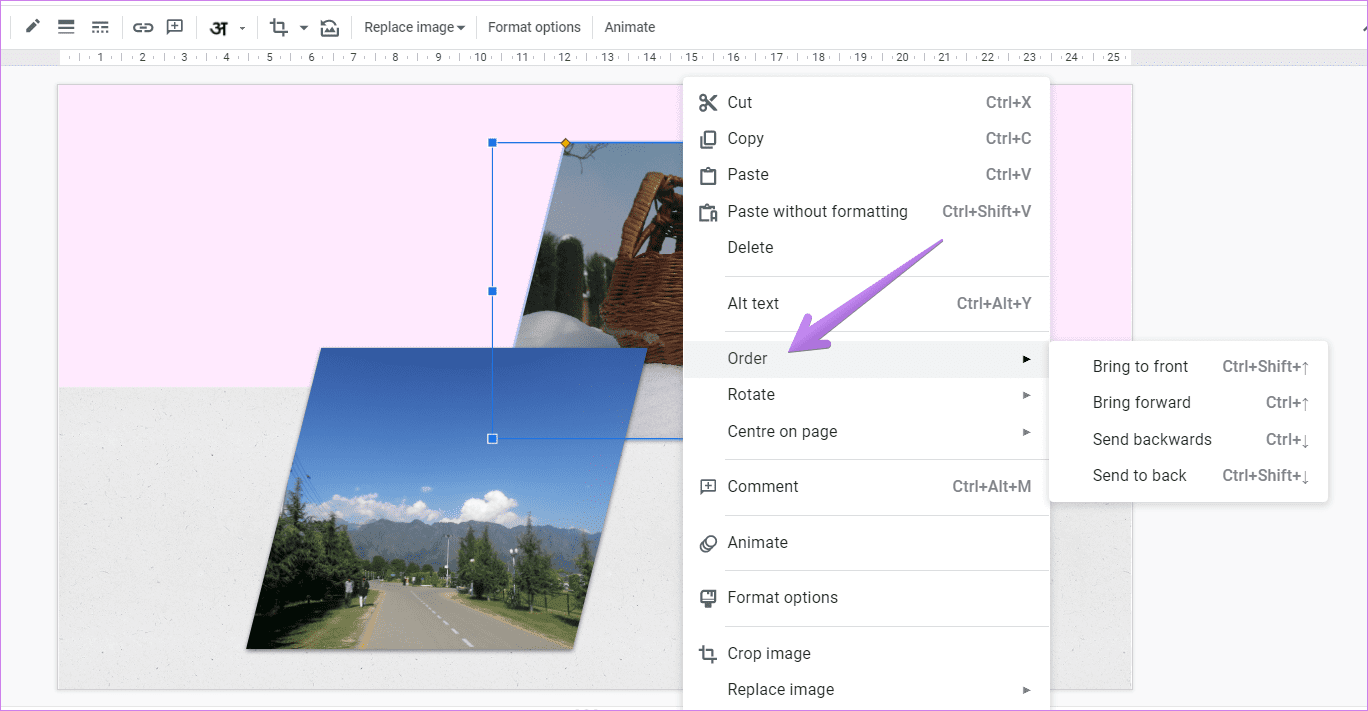
Layering helps in hiding some portion of the images. While using multiple images, you can change the order of pictures in Google Slides and either move them forward or backward. To layer an image, right-click on it and select Order. Choose the required option.
8. Add Border
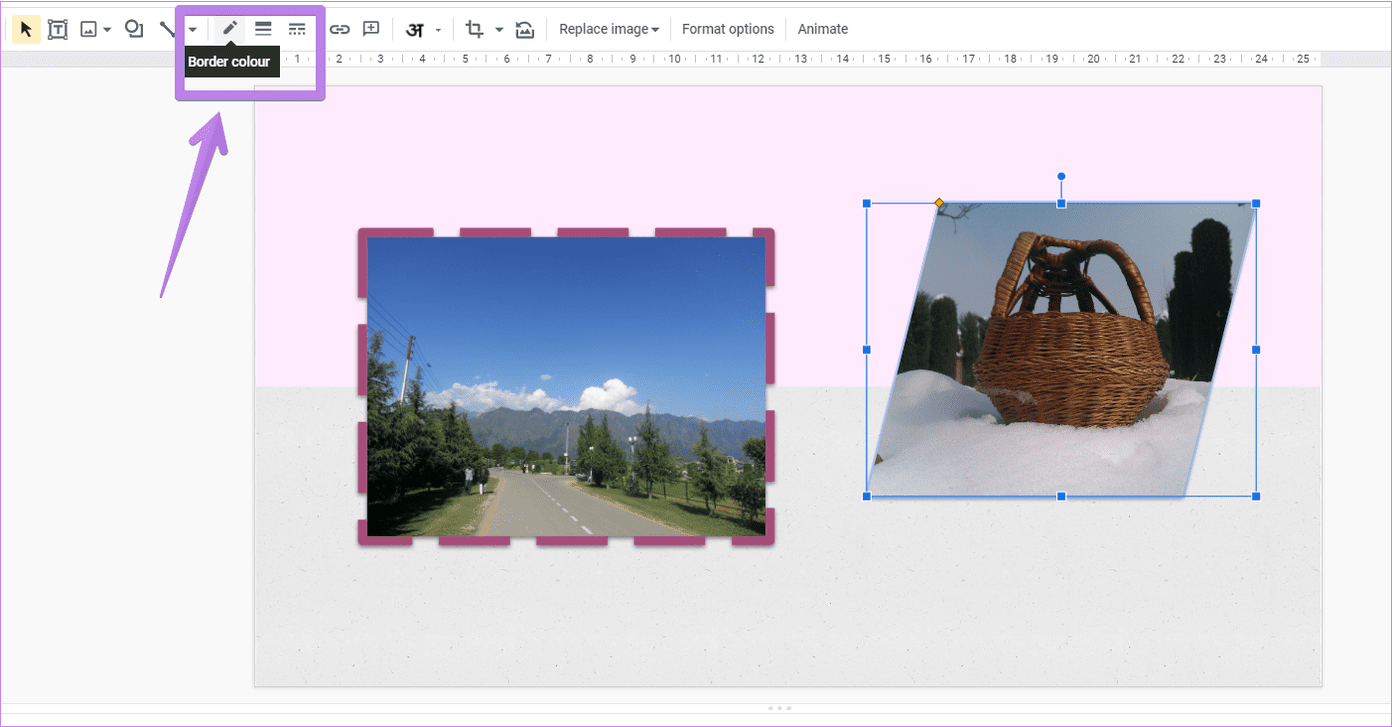
To further customize your image, you can add a border to it. Select the image and choose border style, size, and color from the top menu bar.
9. Add Frame
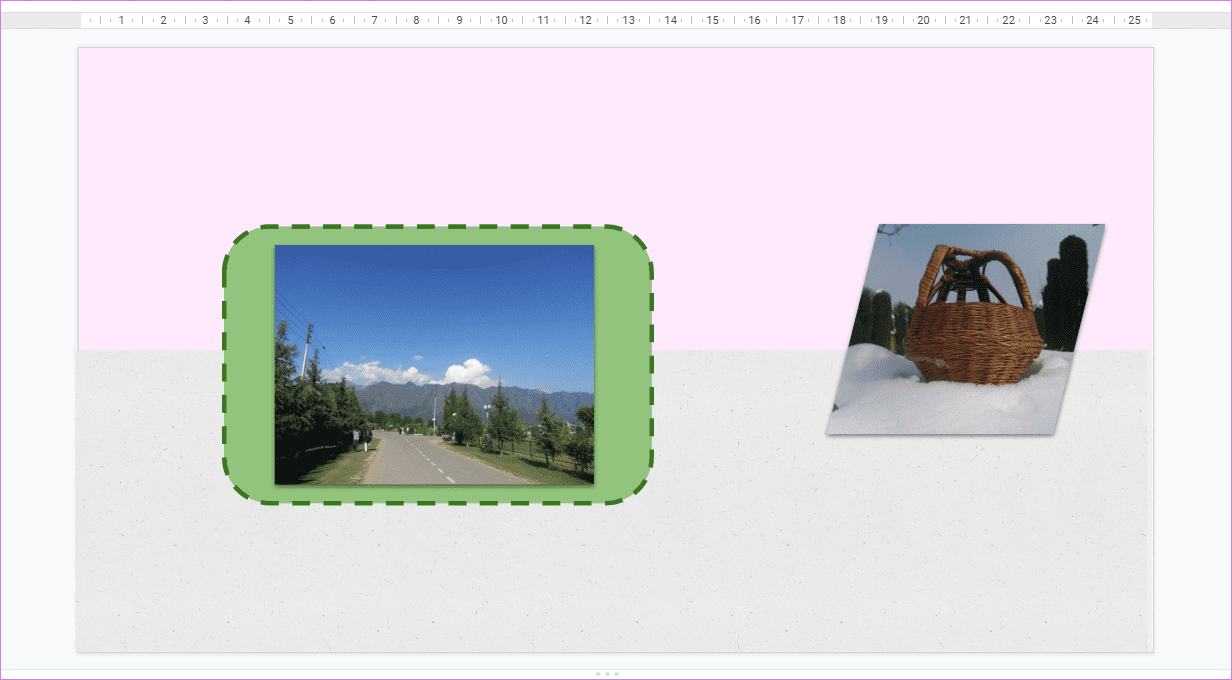
In case the available border styles and formats do not suit your need, you can add frames in another way. Basically, you will have to insert a shape, fill it with the required color (and add a border), and finally, add the image on top of the shape.
Here are the steps in detail:
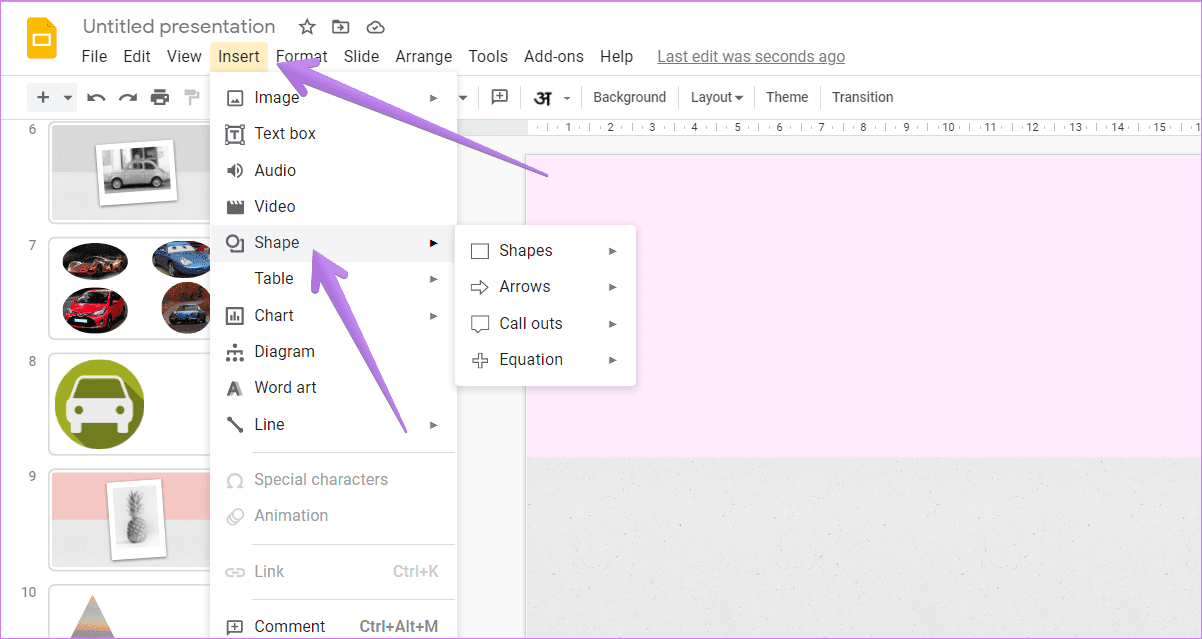
Step 1: Click on Insert from the menu bar and go to Shapes. Select the required shape.
Step 2: Using your mouse, draw the required shape on your slide. With the shape selected, click on the Fill color tool and choose the color of your choice for an image frame.

Step 3: Move your image on top of the frame. If the shape hides the image, change the layering/ordering of images from the right-click menu > Order.
10. Group Items
If you want to perform the same action (move, rotate, resize, etc.) on multiple items or images simultaneously, you can group them. To do so, click on the first image. Then press Ctrl (Windows) or Command (Mac) key and click on other items/images to select them while keeping the keyboard key pressed. Then go to Arrange > Group. For instance, I have grouped the frame shape and the actual image.

11. Animate Images
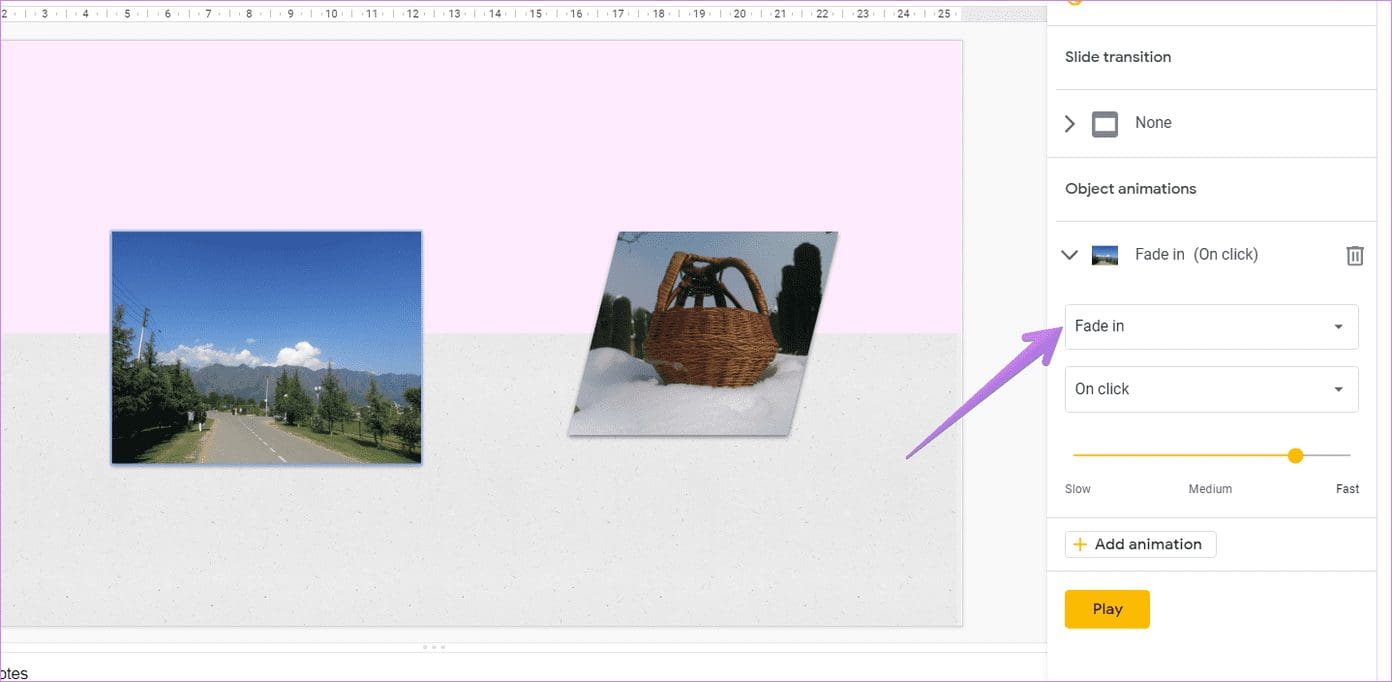
You can animate individual images in Google Slides. For that, right-click on the image and select Animate. From the sidebar, select the animation type and the action that starts the animation. Learn more about animations in Google Slides from our dedicated post.
12. Create a Color Overlay
To create beautiful graphics in Google Slides itself, you can add the color overlay effect. However, this requires some manual work from your end. Here’s the final result followed by steps.
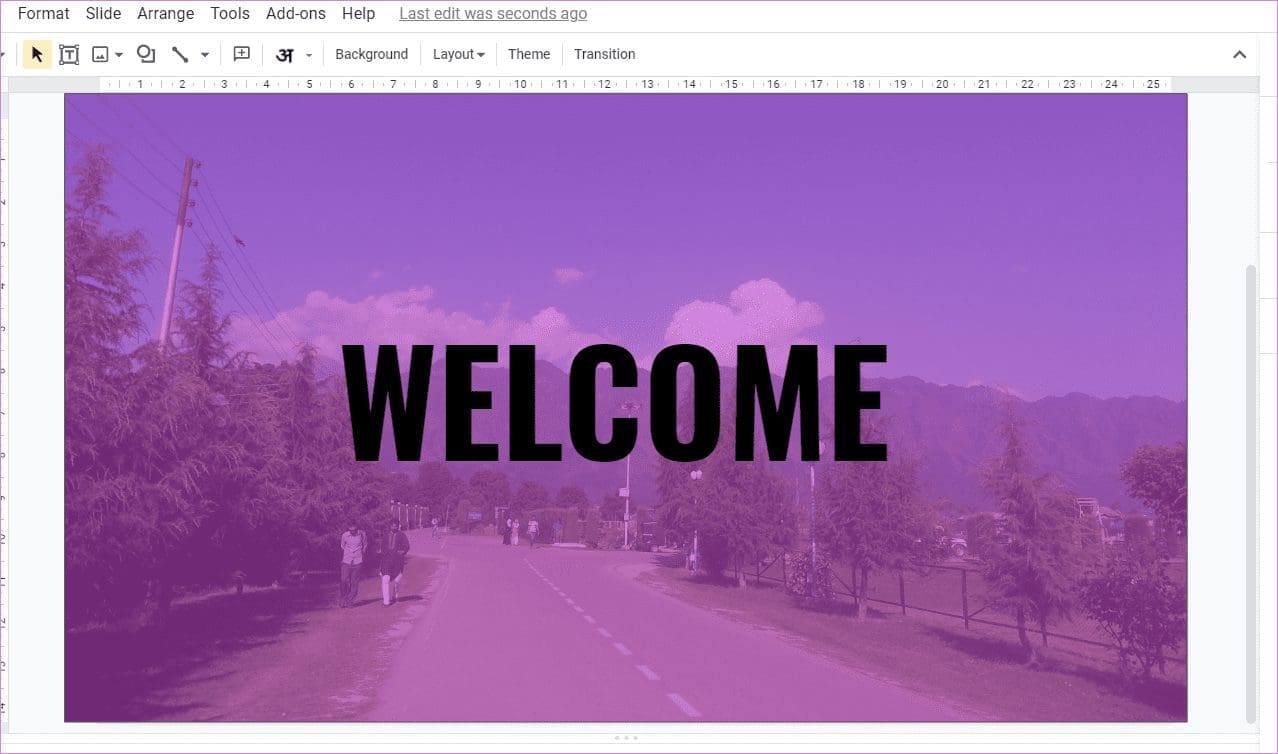
Step 1: Add the background image and increase its size so that it fills the entire slide.
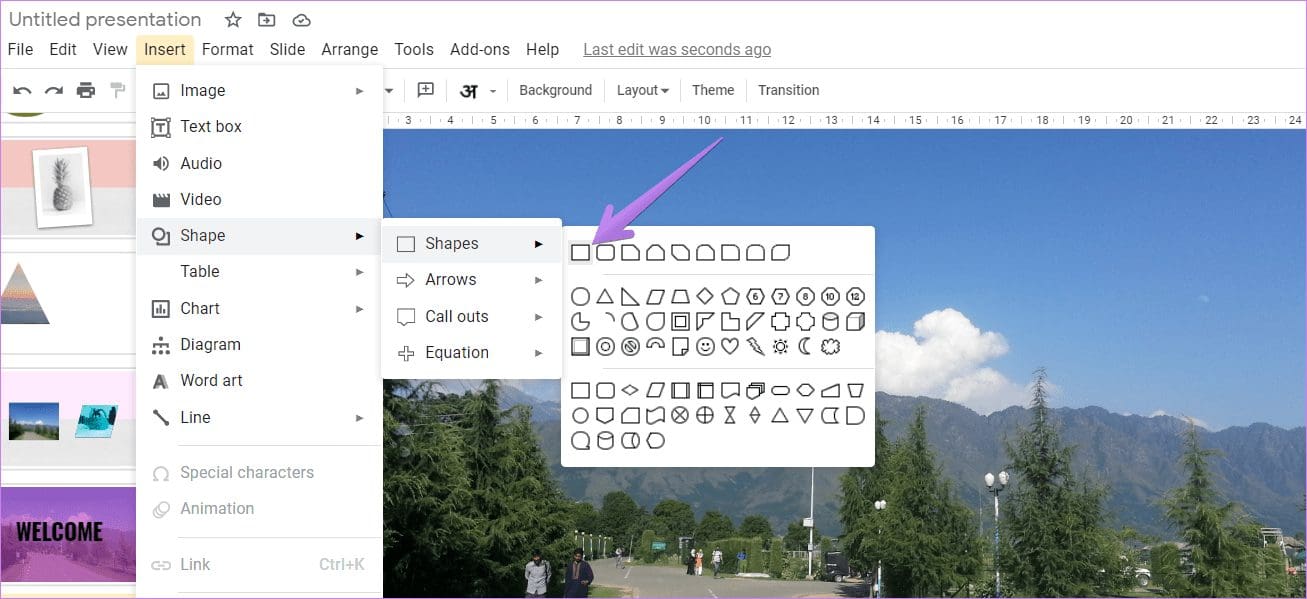
Step 2: Go to Insert > Shape. Select the rectangular shape.
Step 3: Using the mouse, draw the shape so that it covers the entire image.

Step 4: Click on the Fill color tool from the top bar. Click on the tiny add icon under Custom.

Step 5: Select the color that you want to use. Lower the transparency using the slider according to your need. Click on the Ok button.
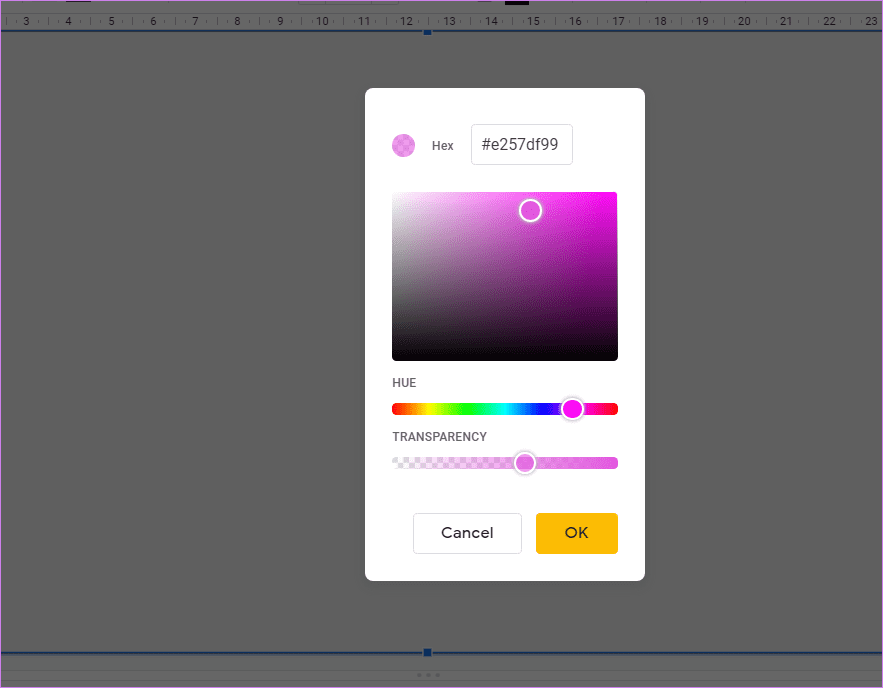
Step 6: The color overlay will appear on your image. Now you can add other images, text, shapes, etc., on top of the overlay, depending on your need.

Pro Tip: Another way to add a color overlay on images is to duplicate the image and add a shape. Fill the shape with color and adjust its transparency.
13. Remove Image Background
Several Google Slides users want to make the background of an image transparent. Sadly, that’s not directly possible in Google Slides. However, you can use www.remove.bg website to remove image backgrounds for free without any technical knowledge.
Pro Tip: Check other free tools to remove image background.
14. Replace Image
Sometimes, when you have made certain modifications to an image, you realize it’s the wrong image. Instead of starting from scratch, you can replace the image. For that, click on the image and hit the Replace image from the top bar. Select the new image.

15. Reset Image
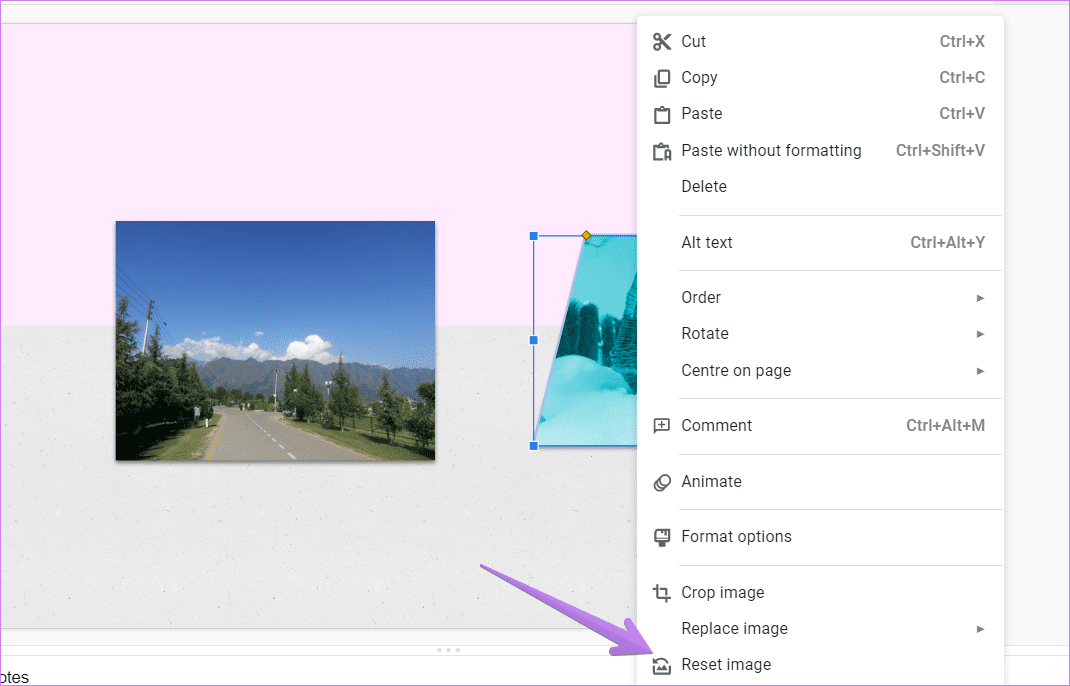
Lastly, if you want to remove modifications from your image, you don’t need to delete it and re-add it. Simply right-click on the image and select Reset image.
Edit Images With More Tips
We hope you liked the Google Slides image editing tips mentioned above. Interestingly, you can hyperlink your images and redirect viewers to a website or a different slide. Further, if you like Bitmojis, you can add Bitmoji photos to your Google Slides too.
Next up: Looking for more ways to improve your productivity in Google Slides? Check out 11 useful templates for Google Slides from the next link.
Thanks for your feedback!


