
Google Chrome is infamous for the excess memory consumption on your Windows PC, and it is possible you may run into the Google Chrome ‘Error Code: Out of Memory’ while browsing a content-heavy website. If you’re currently facing a problem on your PC, we’re here to help you out.

In this article, we want to show you ten effective methods to get rid of the Chrome Out of Memory error on your PC. Let’s begin with closing all the unwanted tabs on Google Chrome which does have a good chance of resolving the issue.
1. Close Unused Tabs and Windows
Closing unused tabs can free up the memory that Google Chrome is occupying on your PC. Media-heavy websites that are running on tabs can consume a significant amount of RAM. Therefore, if you have a lot of tabs open, make sure to close the ones you don’t need.
2. Force Close Applications in Task Manager
The good old Task Manager – at our rescue when we need it. You can shut down applications that you don’t want to use, and effectively free up some memory for Google Chrome. Simply closing the Window of apps will not shut it down completely, a few processes may run in the background, thereby continuing to consume the memory. Therefore, make sure to close them using the Task Manager.
Open the Task Manager on your PC, and click on the End Task button to shut down applications.

3. Turn Off Extensions
Turn off, and disable all the extensions that you do not want to use. Extensions are additional components of Google Chrome that consume memory on your Windows PC. Disabling a few of them can help you free up memory for the other active tasks.
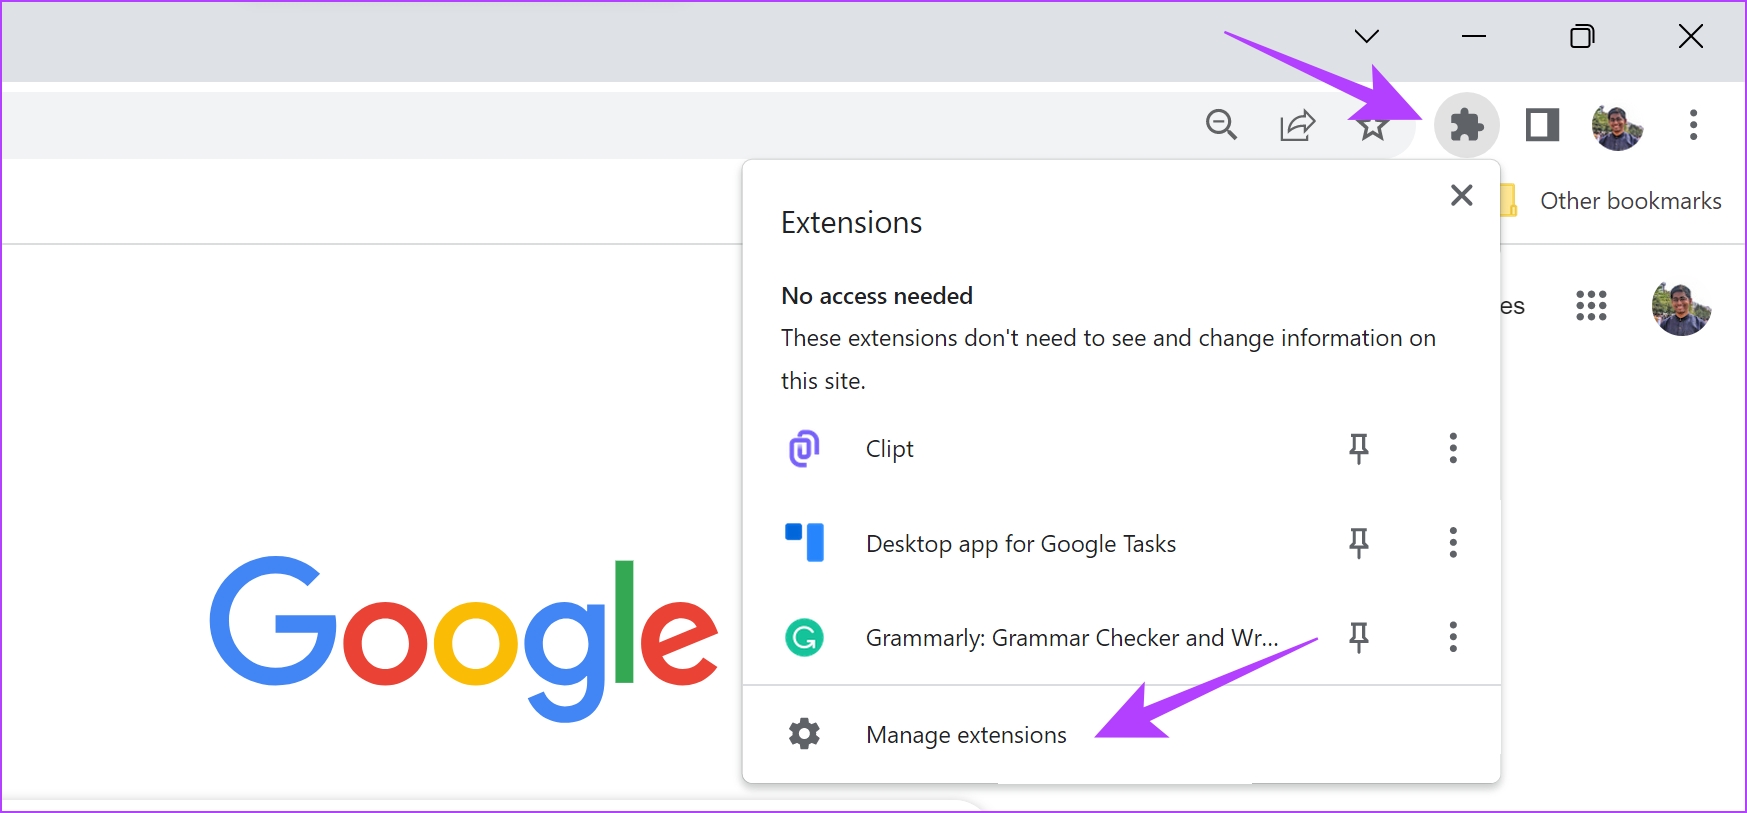
Step 1: Open Chrome, click on the extensions icon on the toolbar, and select Manage Extensions.
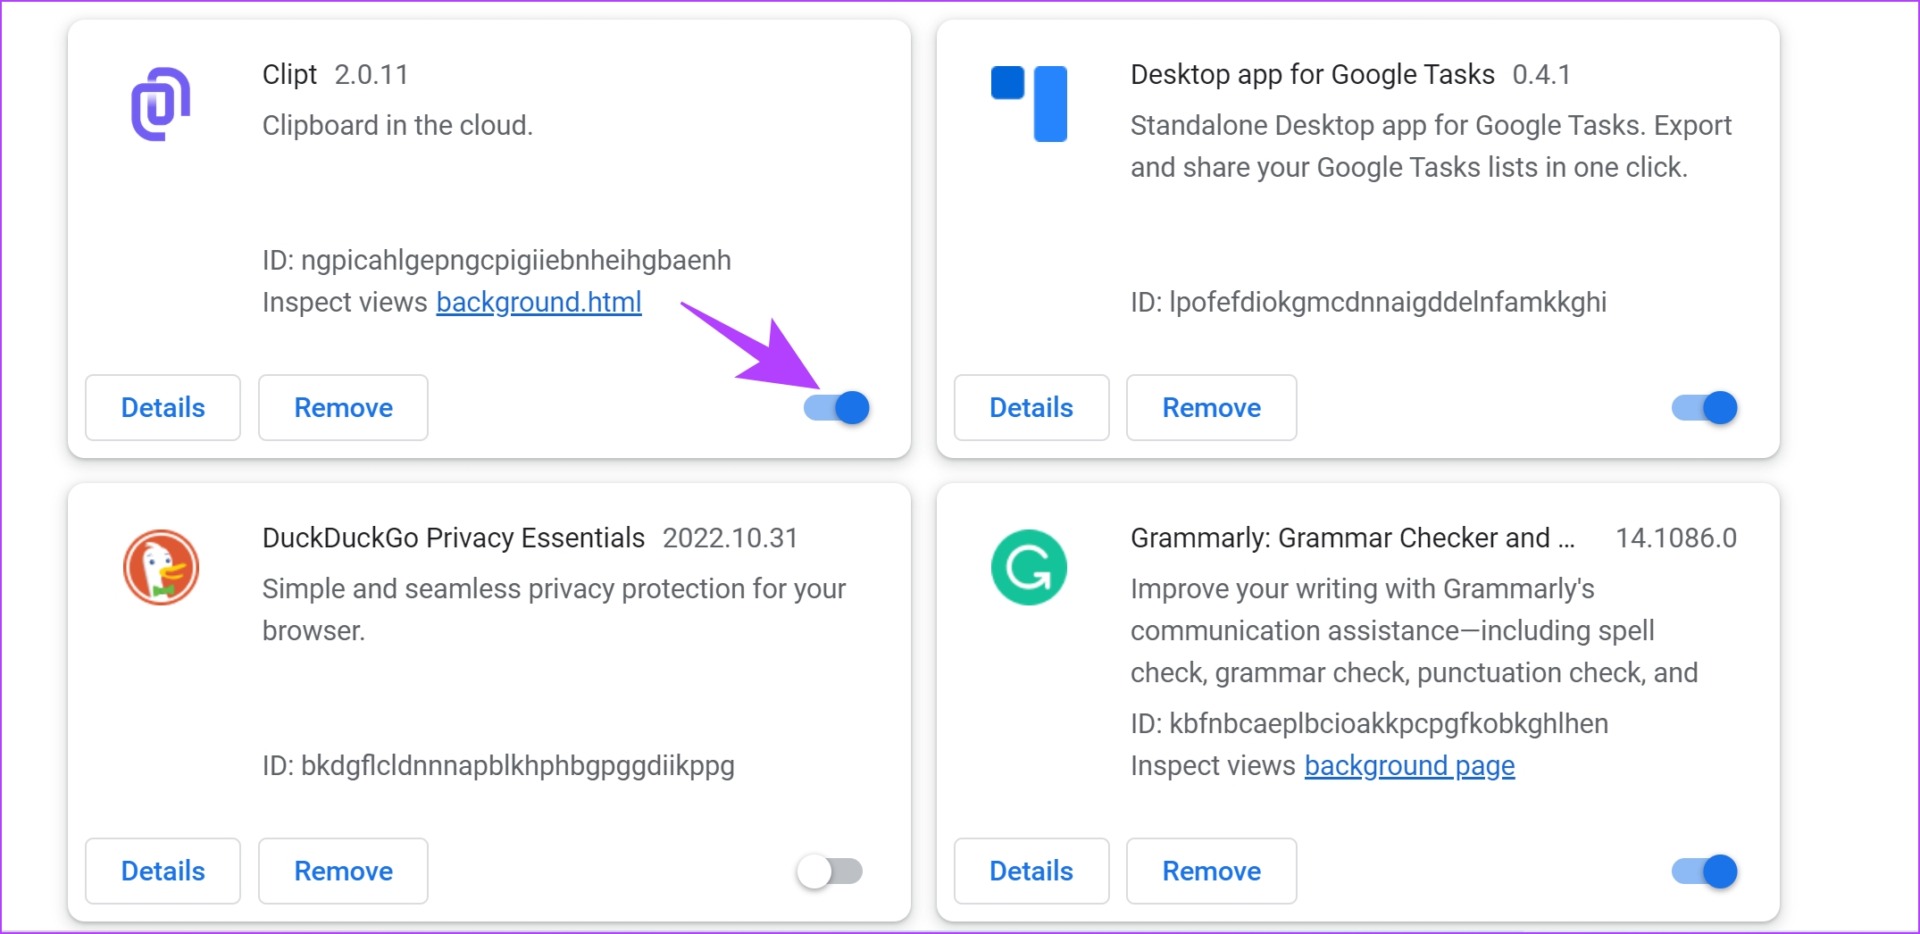
Step 2: You will now see a list of installed extensions. Turn off the toggle to disable an extension and check if it solves the issue. Repeat this for all the installed extensions.
4. Enable Memory Saver
The memory saver mode is a feature on Google Chrome that helps reduce the RAM usage by Google Chrome on your system. The feature works by putting a few unused tabs to sleep, along with a few other non-important tasks – in exchange for freeing up some RAM and prioritizing other intensive tasks that help result in improving the performance of Google Chrome.
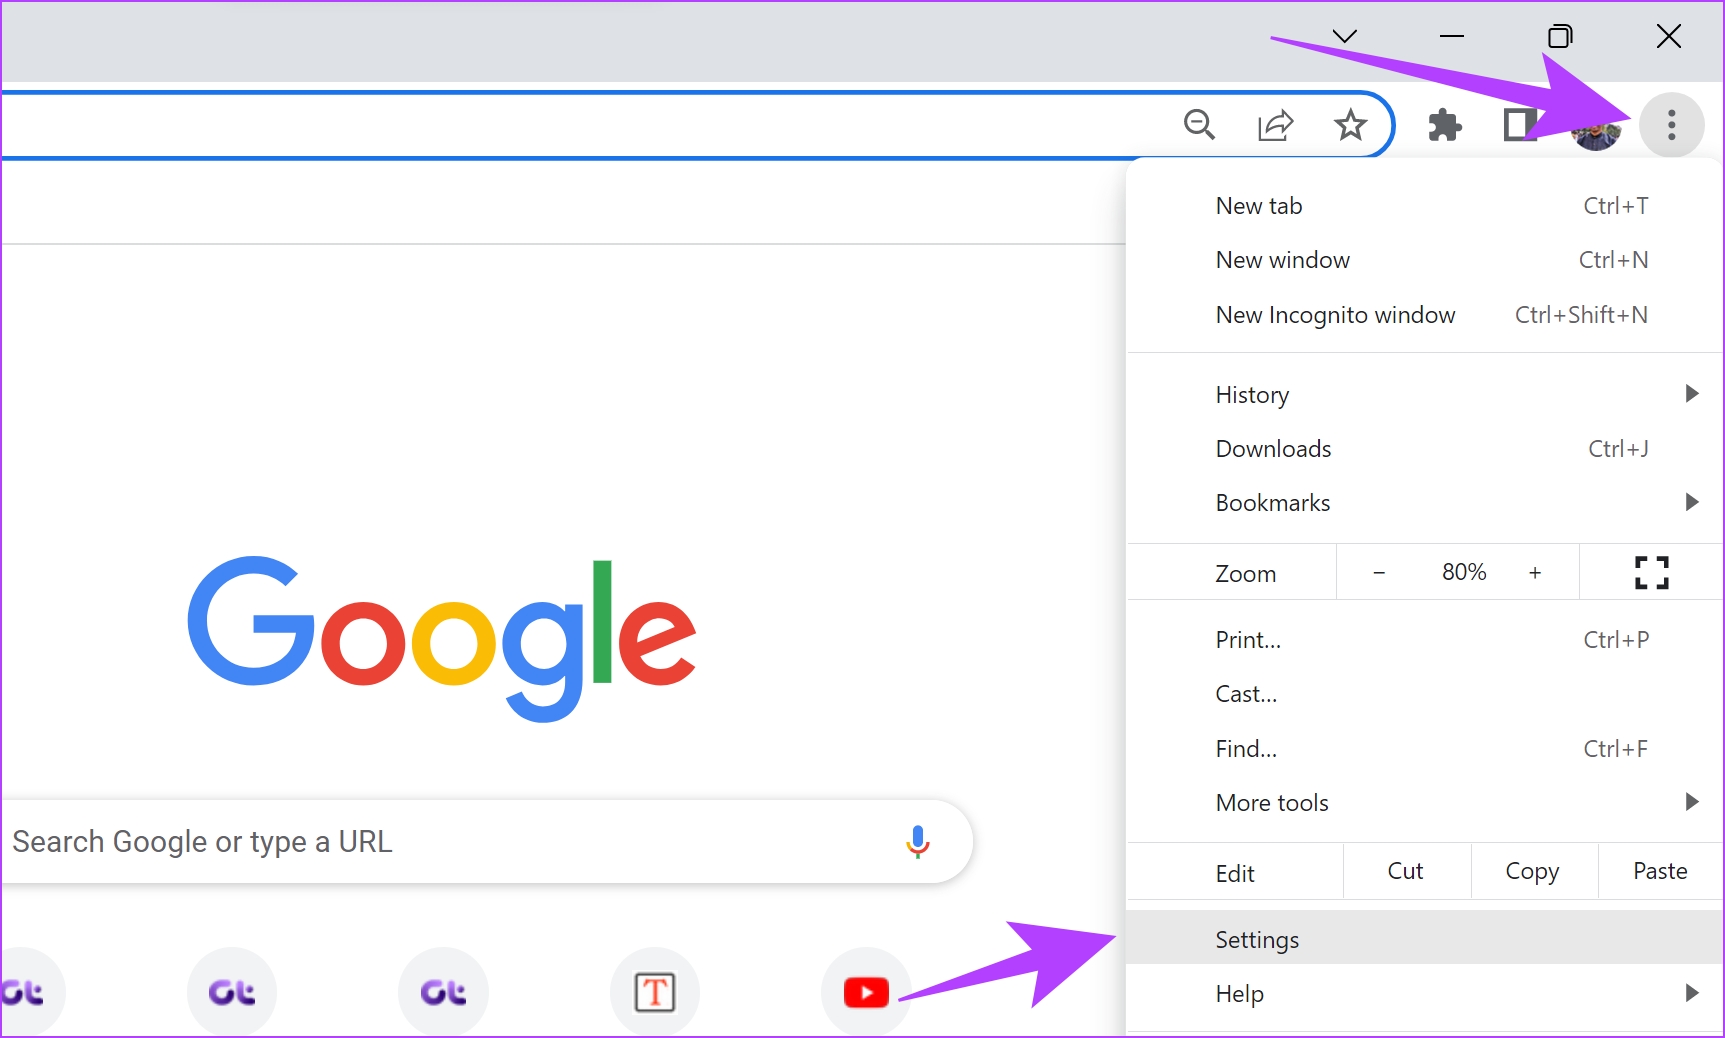
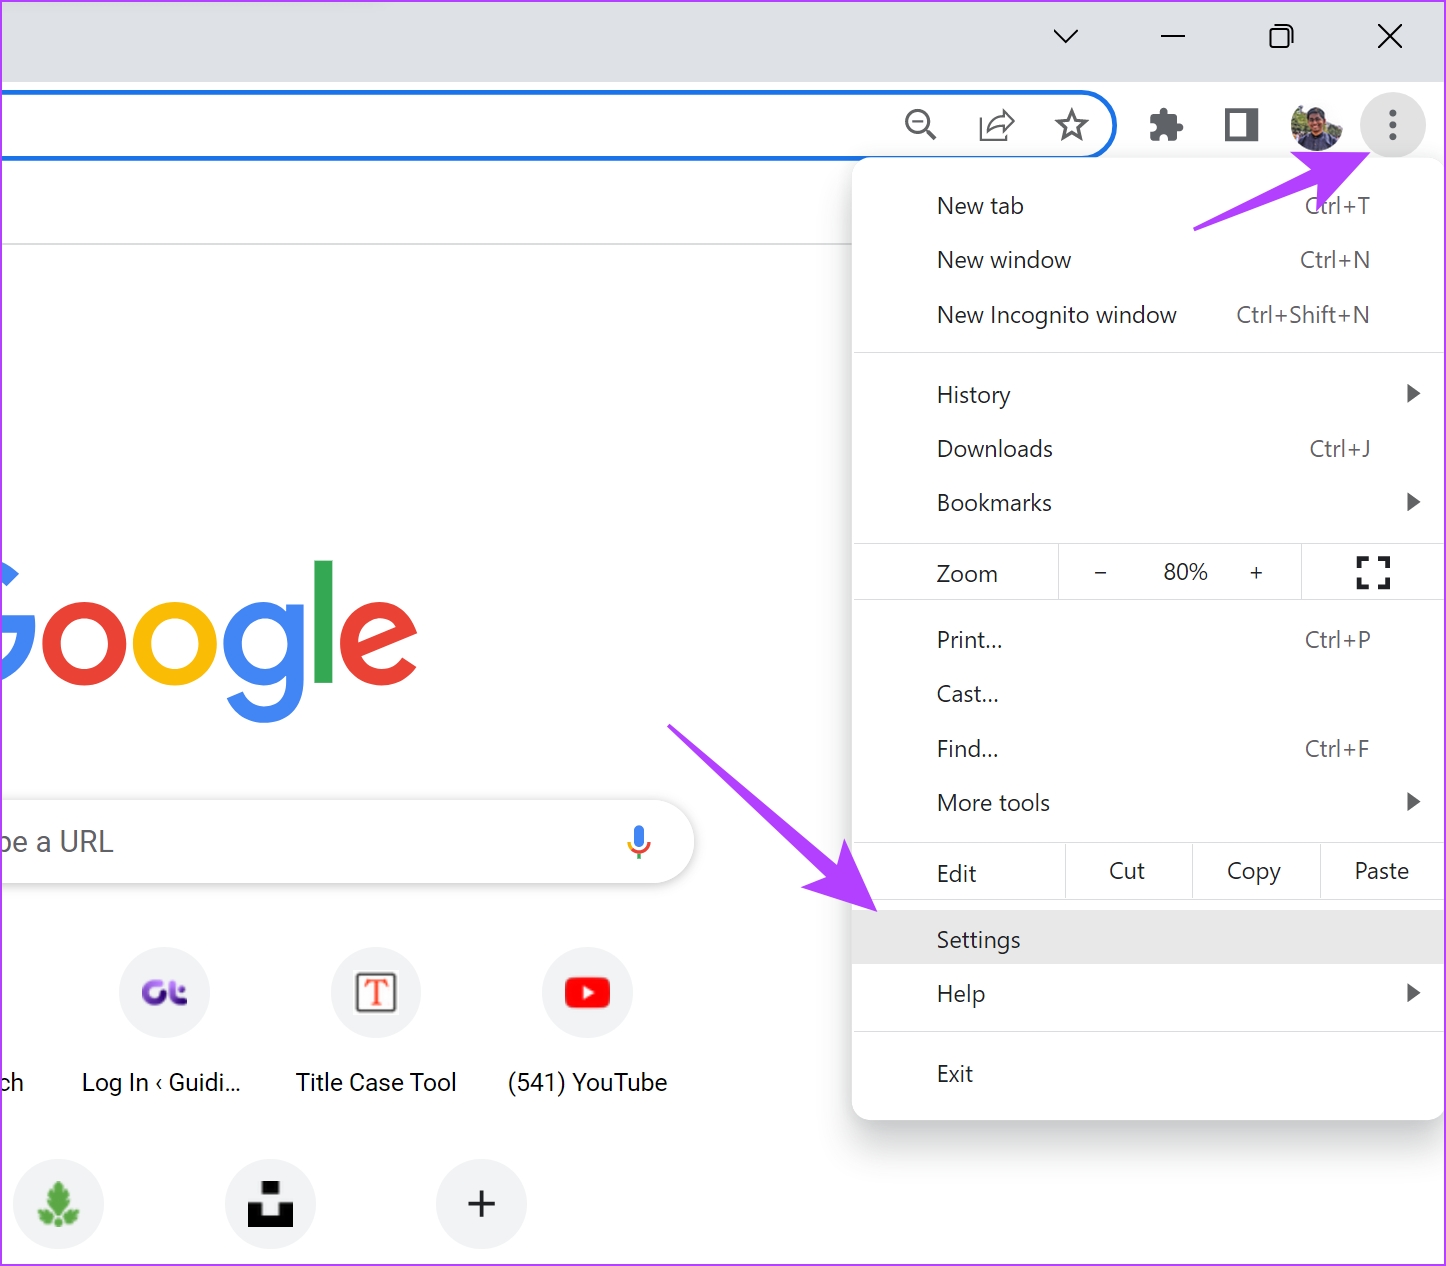
Step 1: Open Chrome, click on the three dots icon in the top right, and select Settings.

Step 2: Click on Performance in the sidebar.
Step 3: Turn on the toggle for Memory Saver.

5. Clear Chrome Cache and Cookies
Junk files on Google Chrome can increase the storage space and the resources that the browser occupies on your PC. Clearing these junk files can help speed up the performance of Chrome, by using lesser resources on your Windows PC.
Note: Your browsing and download history, cookies, and cache will be deleted from Google Chrome and unless selected, your passwords will not be deleted.
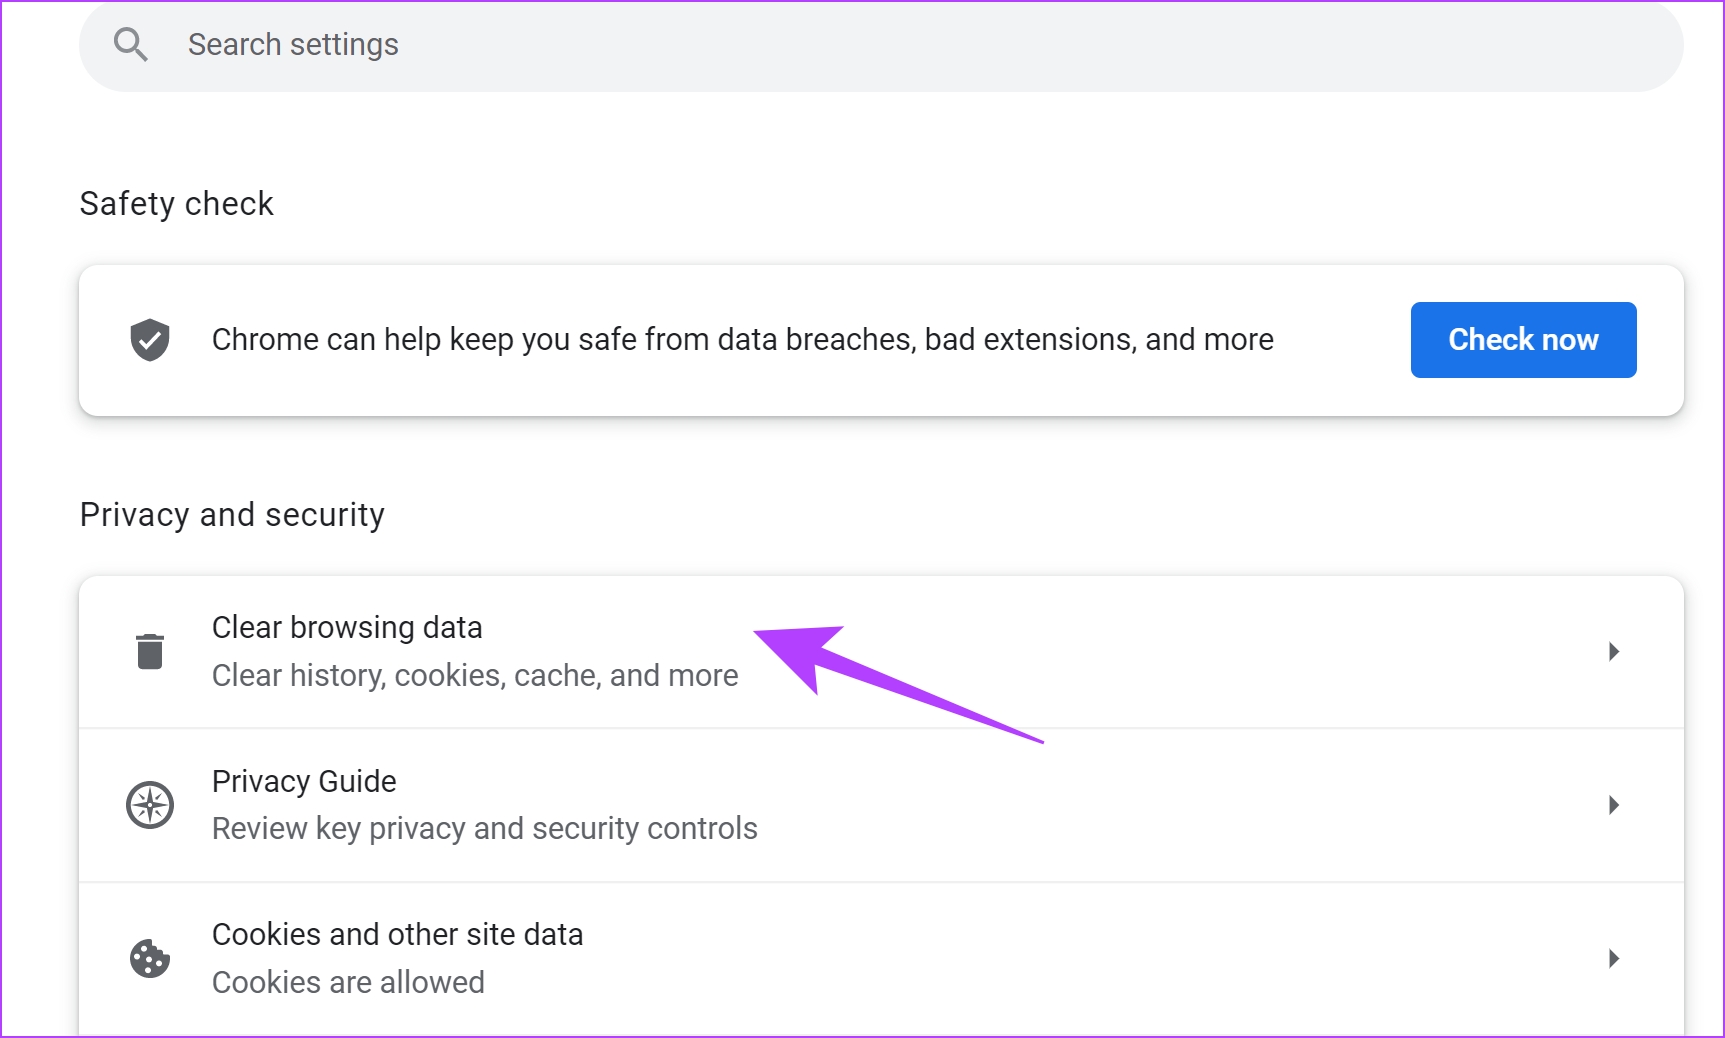
Step 1: Click on the three dots icon on the toolbar and select Settings.
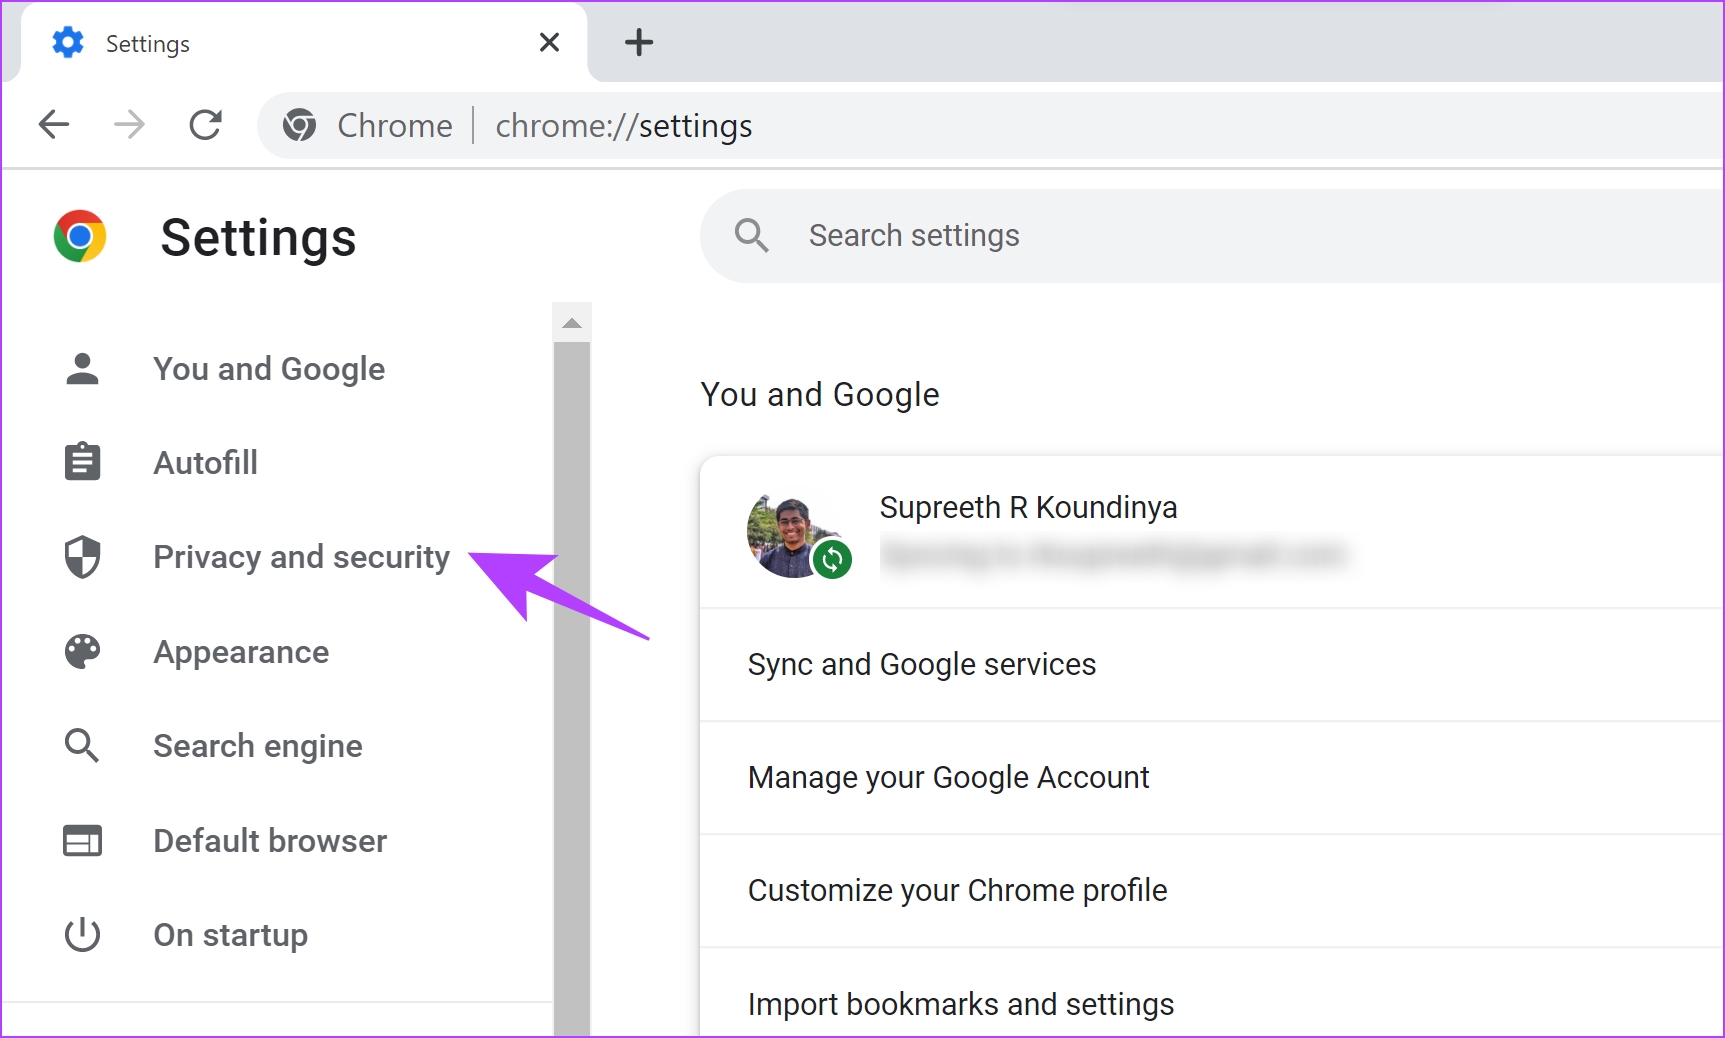
Step 2: Click on ‘Privacy and security’.
Step 3: Select ‘Clear browsing data’.
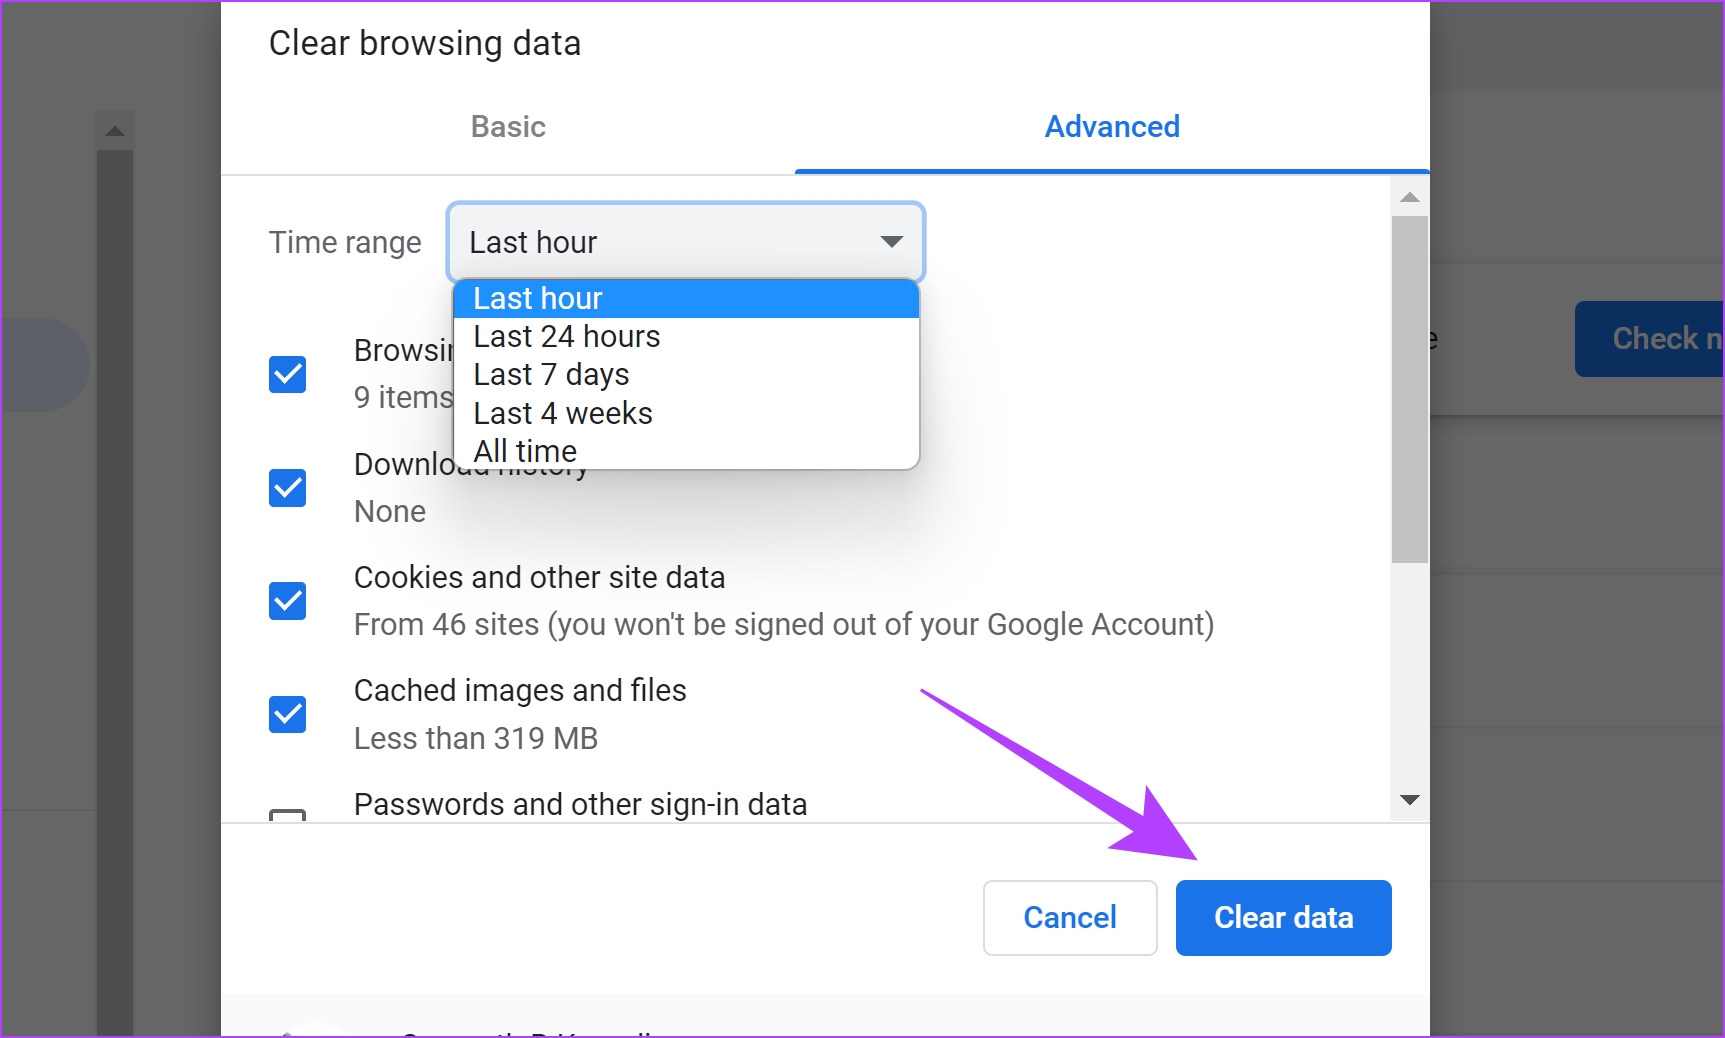
Step 4: Click on the dropdown menu for the Time range and select the period for which you want to delete the browsing data.
Step 5: Now, click on clear data.
6. Delete Temporary Files
Temporary files on your Windows PC may also be hogging up the memory. Deleting them can potentially free up your RAM for active apps and processes – like Google Chrome.
Step 1: Open Run from the start menu.

Step 2: Type in ‘%temp%’ and hit OK.

Step 3: This will open up the temporary folder. Use Ctrl + A to select all the files.
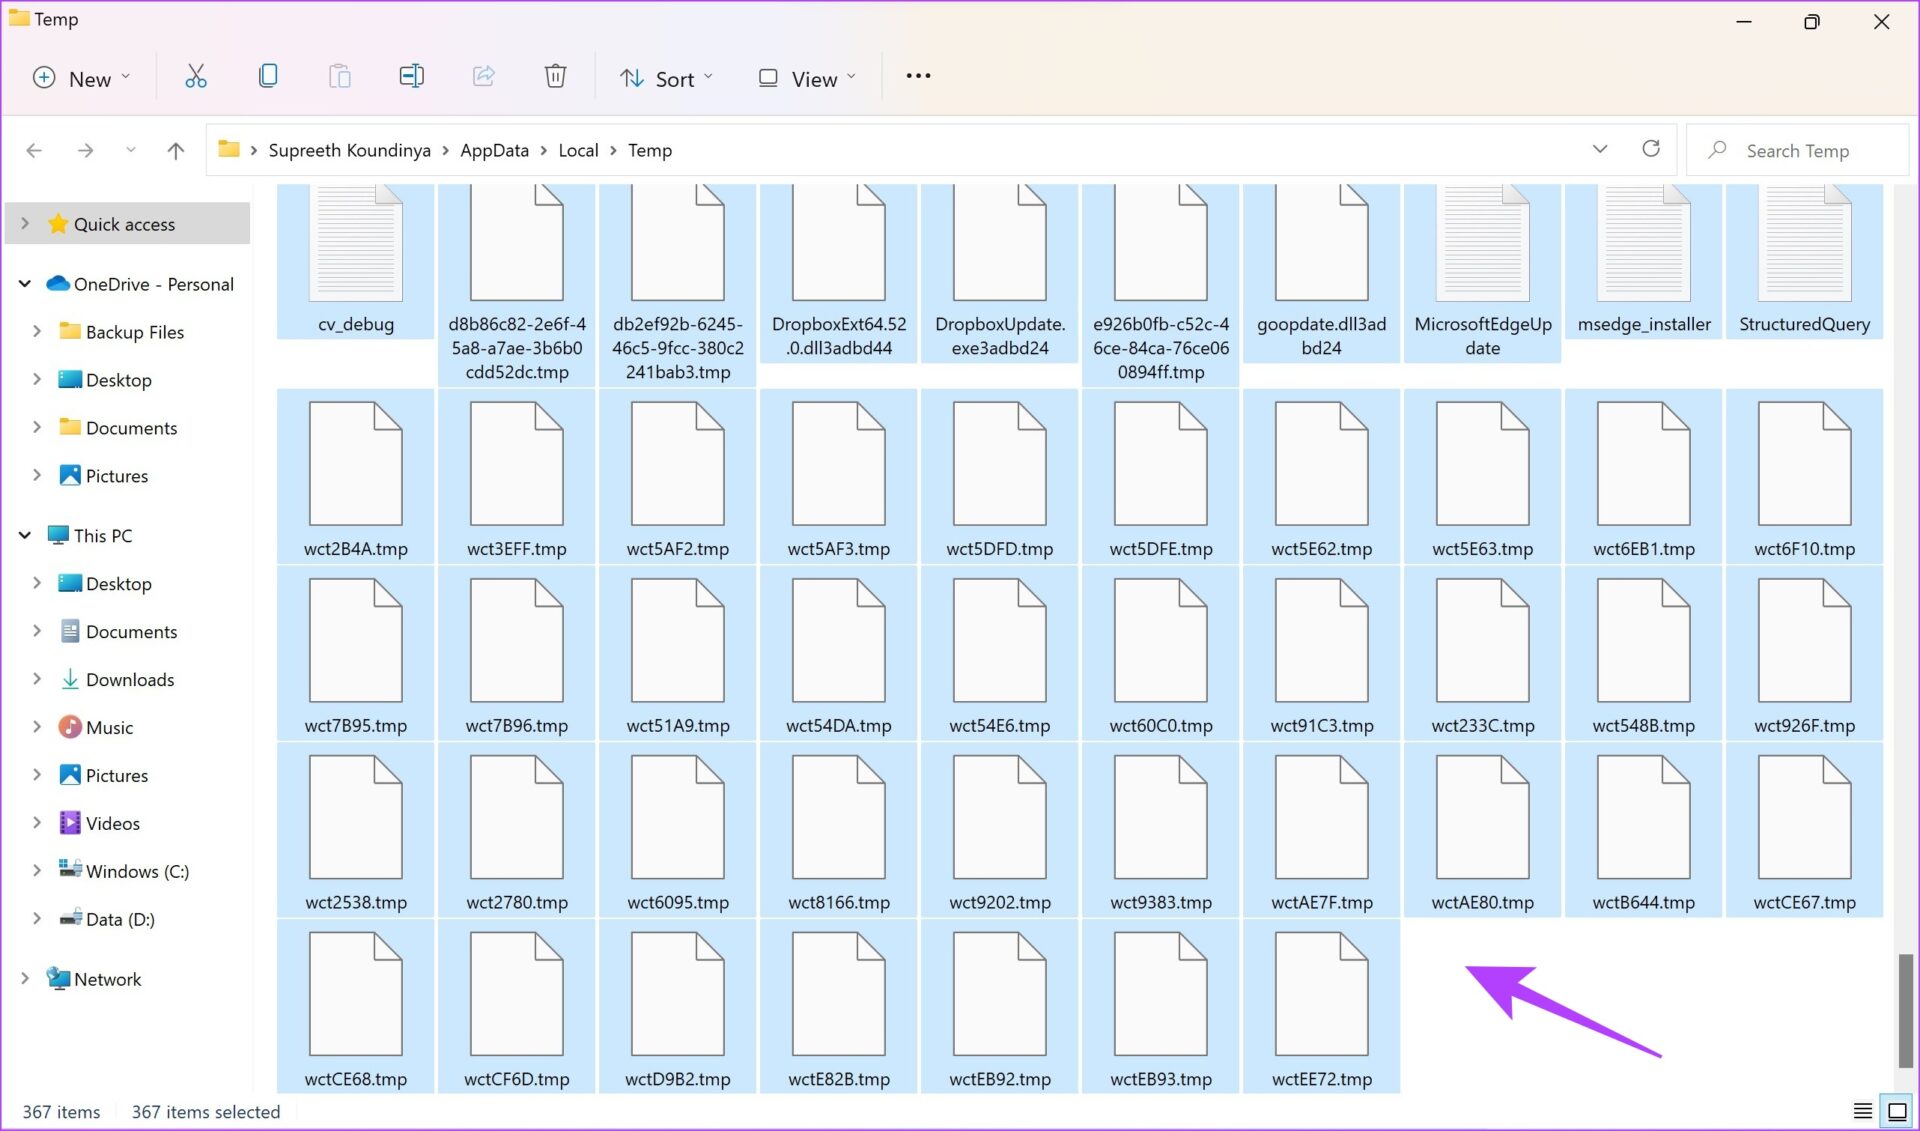
Step 4: Now, right-click and select the delete option. They will now be moved to the recycle bin.

7. Enable Virtual Memory
Your Windows PC may also have a virtual memory feature, that can allocate a portion of your disk as additional memory. This can help increase the available memory for Google Chrome, thereby fixing the issue.
You can read this guide to enable and increase the virtual memory on your Windows PC.
8. Reset Google Chrome
Resetting all the settings on Google Chrome returns all the settings to the default states. If the Google Chrome ‘Error Code: Out of Memory’ occurs due to any misconfigurations, doing this can help you fix it.
Step 1: Open Chrome and click on the three dots icon in the toolbar. Select Settings.
Step 2: Now select ‘Reset and Clean up’ in the left pane.
Step 3: Select ‘Restore settings to their original defaults’.

Step 4: Now, click on Reset settings to reset all settings on Chrome.

9. Re-install Google Chrome
If none of the above methods work, wipe out the currently installed version of Chrome and try reinstalling it. This can help you get rid of all the bugs and corrupted files that may be causing the issue.
Step 1: Open the Control Panel, and select Programs -> ‘Programs and Features’.

Step 2: Double-click to uninstall Google Chrome.

Step 3: Download Google Chrome from the official source using the link below.
If you have any further questions, you can take a look at the FAQ section below.
FAQs: Out of Memory Error on Chrome
You can open the Task Manager on your Windows PC to check the memory occupied by Google Chrome.
In our personal experience, we can say that Microsoft Edge did occupy less RAM than Chrome on our PC.
Fix High Memory Usage on Google Chrome
We hope this article helps you get rid of the ‘Chrome Error Code: Out of Memory’ pop-up that prevents you from using the browser on your Windows PC. Which of these tips helped you out? Do let us know in the comment section below!


