How to Transfer Data Between Google Accounts
Whether that quirky email ID you chose earlier is not fun anymore or you want one that sounds more professional, there can be many reasons to switch to a new email address. However, creating a new account only solves one-half of the problem. The other half is the all-important data, including your emails, calendar, contacts, notes, and more. Thankfully, you can transfer data from one Google account to another in a few simple steps.

While possible, transferring data isn’t necessarily a simple one-click task as you need to transfer each element individually. To help you guide through the process, we’ve created a step-by-step guide to transferring data between Google accounts.
1. Emails and Contacts
Once you’ve created the new Google account, you can easily sync your old emails and contacts by following the steps below.
Step 1: Open Gmail and log in with your new account. Click on the Settings icon in the top right corner and tap on the ‘See all settings’ button.

Step 2: Now under the ‘Account and Import’ tab, select ‘Import mail and contacts’.
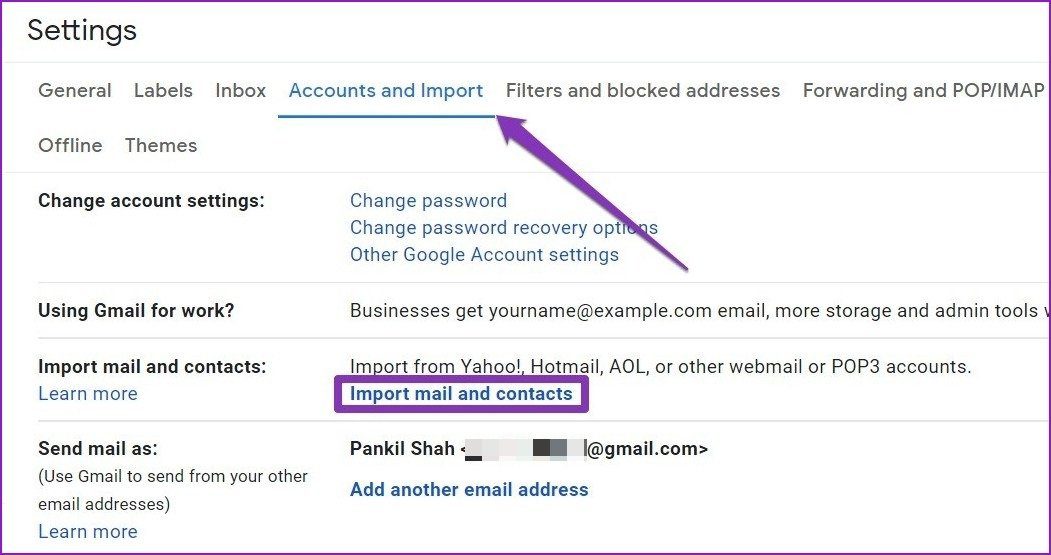
Step 3: A new window will appear asking you to sign in with the account you wish to import emails and contacts.
Once verified, it’ll sync both the email and contacts from your old account to your new one.
2. Google Drive Files
You can easily transfer files and folders backed up in your old Google account using the share option. Here’s how.
Step 1: Open Google Drive and log in with your old account.
Step 2: Find and select the files you wish to transfer. Now right-click on your selection and choose the Share option from the list.

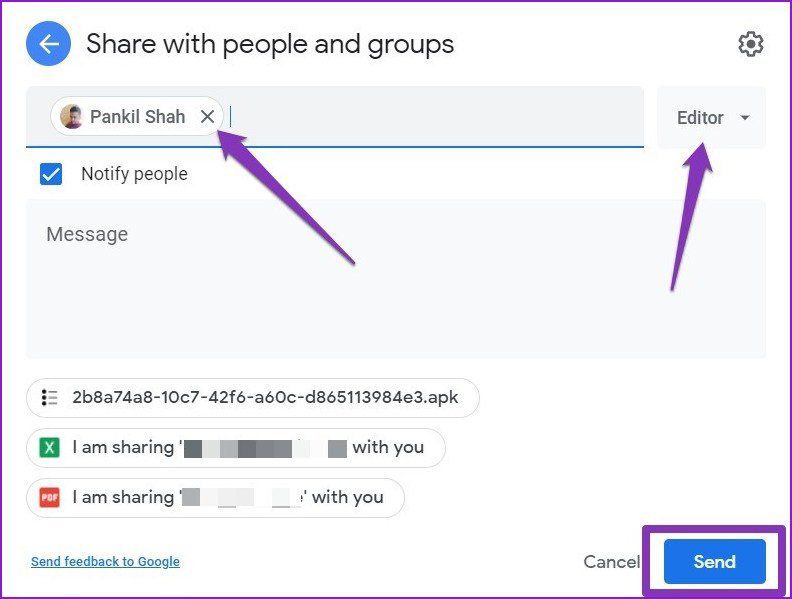
Step 3: In the pop-up window that opens, enter your new email address. Make sure to select the role as ‘Editor’ before hitting the Share button.
Step 4: Again, right-click on the selection to open the Share menu. This time you’ll get two additional ‘Make owner’ and ‘Remove’ options. Change it to ‘Make owner’ and click on Yes when prompted.

That’s it. All the files along with their ownership is transferred to your new Google account.
3. Google Photos
The most straightforward way to transfer photos between the account is with the download and upload method. Let’s see how.
Step 1: Open Google Photos and log in with your old account. Now select all the photos you wish to transfer and use the Ctrl+D shortcut to download them.

Step 2: The photos will be downloaded in a zip file. Extract the zip file on your computer.
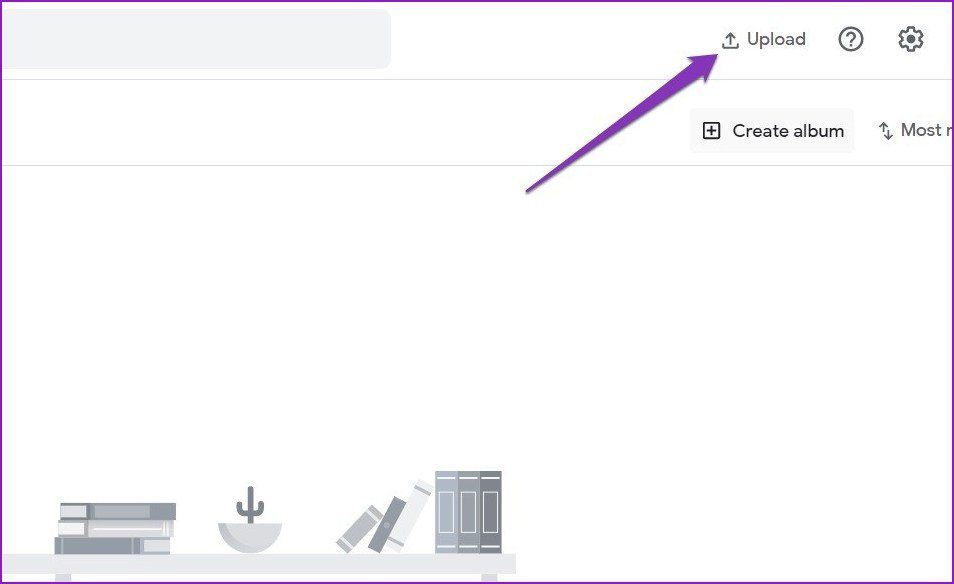
Step 3: Now open Google Photos and log in with the new account. Tap on the Upload button at the top to upload the extracted images on your computer.
Depending upon the number of images selected and the internet speed, this process may take a few minutes to a few hours.
4. Calendar Events & Reminders
If you wish to copy all of your calendar events and reminders from one account to another, you can simply export the ICS file from one account then import it into another. Here’s how.
Step 1: Open Google Calendar on a web browser and log in with the old account.
Step 2: Under the My Calendars section on your left, select the three vertical dots next to the calendar you want to transfer and choose Settings and sharing.

Step 3: Click on the Export calendar button and a zip file will be downloaded. Extract the zip file to get the ICS file inside it.

Step 4: Now login with your new Google calendar account and select the settings icon in the top right corner and choose Settings from the list.
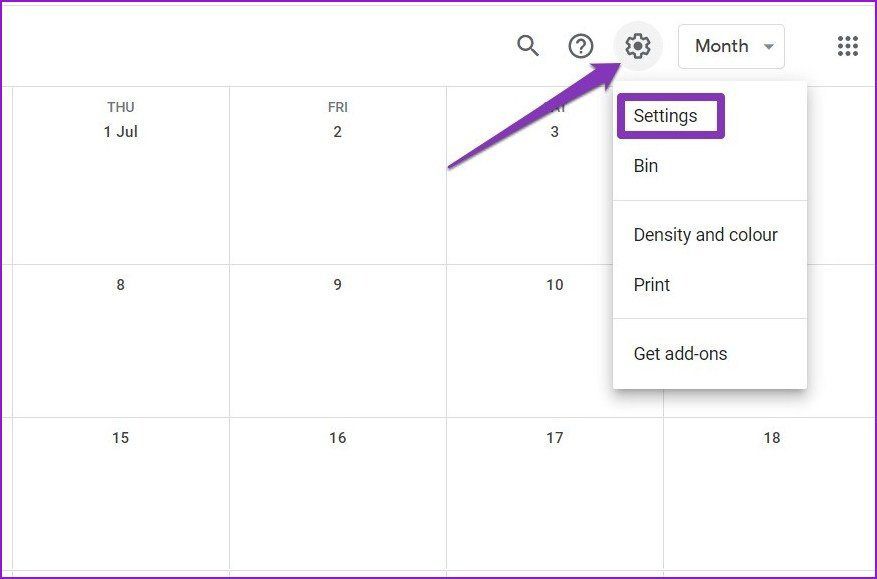
Step 5: Now go to the ‘Import & export’ tab on your left. Choose ‘Select file from your computer’ to open the ICS file. Finally, click on the Import button.

Bonus: Download Google Account Data with Google Takeout
You can easily download all of the data associated with your Google account at once using Google Takeout. Here’s how.
Step 1: Go to the Google Takeout page (link below) and log in with the account from which you wish to transfer data.
Step 2: The page will show all sorts of data linked to your Google account, including contacts, emails, calendar, etc. Make the appropriate selection using the checkboxes and click on the ‘Next step’ button at the bottom.
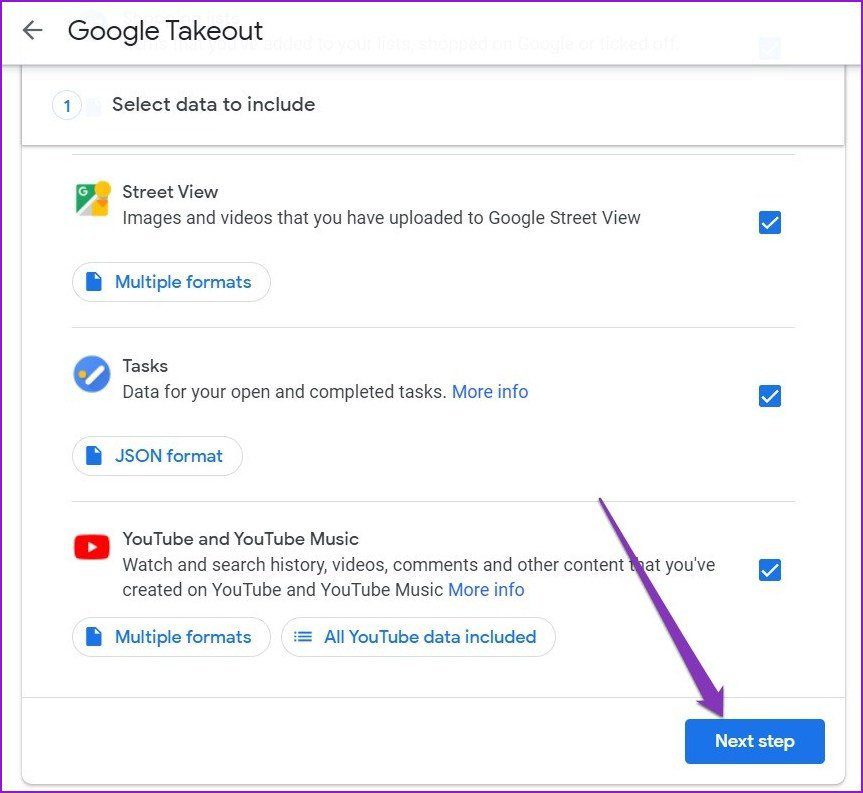
Step 3: Now, choose between the available Delivery method, File type & size, and Frequency. Finally, click on Create export. Once the export is created, click on the download button, and it’ll download zip on your device.

Note: The downloading process may take some time, depending on the size of the data and the number of services selected.
Extract the downloaded zip file on your computer, and now you’re all set to upload the data to your new account. This way, you don’t have to download all of your photos, files, calendar, etc., individually.
Migration Made Easy
While not straightforward, transferring data between Google accounts isn’t that difficult. Considering it’s a one-time process. While Google allows you to migrate to a new account with most of your data, you still won’t get Tasks, purchases in the Play Store, YouTube subscription data, etc. Plus, you also won’t be allowed to transfer apps, games, music purchased, or your Google Play balance.


