How to Download and Use NVIDIA Chat with RTX on Windows

AI is almost everywhere; with platforms like ChatGPT, it is now even available on your smartphone. However, the downside is that all your data is uploaded to someone else’s server. Wouldn’t it be great if you had a local AI for your needs? Enter Nvidia’s Chat with RTX. A personal AI assistant within your reach, ready to answer your questions, summarize documents, and engage in casual conversation.

Chat with RTX is a tech demo from NVIDIA that brings the power of generative AI directly to your fingertips, powered by the magic of your RTX graphics card. In this guide, we’ll guide you through everything you need to know about Chat with RTX, including what it is, how to download and install it on your Windows PC, and how to use it to its full potential. So, let’s get to it.
What Is Chat with RTX
Chat with RTX is your local chatbot, where processing power resides locally on your device. This ensures privacy, lightning-fast responses, and seamless integration with your workflow. It’s powered by retrieval-augmented generation (RAG), TensorRT-LLM, and RTX acceleration technologies to understand your queries and deliver contextually relevant responses.

You can feed it a relevant dataset, be it documents, videos, or your notes. Then, you can quiz the tool to offer answers based on the information contained within. Alternatively, you can share YouTube video links, and Chat with RTX can answer your queries based on the same. The difference is that the processing happens on your system, ensuring faster responses and securing your privacy.
System Requirements for Chat with RTX
Now that you clearly understand what Chat with RTX Voice is, you would love to take it out for a spin, right? But before diving into the AI playground, ensure your system meets the following requirements:
- Operating System: Windows 11
- Graphics Card: NVIDIA GeForce RTX 30 or 40 Series GPU, or NVIDIA RTX Ampere/Ada Generation GPU with at least 8GB of VRAM
- RAM: 16GB or greater
- NVIDIA Driver: Version 535.11 or later
It’s worth noting that while the official requirements mention Windows 11, Chat with RTX also works on Windows 10 systems. However, ensure you’re running the latest drivers for your GPU. If not, download the latest driver package from the link below.
How to Download and Install Chat with RTX on Your PC
Now that your system is ready, install Chat with RTX on your Windows system. Here’s how to do that.
Step 1: Download the Chat with RTX installer file from the link below on your system. Note that the package file is over 35GB in size. So, arm yourself with patience and a stable internet connection.
Additionally, you can use a download manager to boost the download speed. Once the file downloads, extract the ZIP file to the folder of your choice.
Step 2: Once extracted, navigate to the folder. Double-click on the setup file to launch it.

Step 3: Now, install the Chat with RTX application like any regular software on your system.
Note: NVIDIA has mentioned that the tool can have issues if installed in a different directory. So, use the default installation location only.

Step 4: Once installed, launch it using the Chat With RTX app shortcuts added to your start menu and desktop screen. Inside, you will be greeted with the Command Prompt window. The app automatically detects your RTX GPU and allocates VRAM for optimal performance.
Step 5: Once done, press ctrl + left-click on the link inside the Command Prompt window to open the main interface.

Once done, you can select the AI Data Model of your choice, namely Llama or Mistral. Depending on your queries, the answers will vary from model to model.
How to Use Chat with RTX on Your PC
Now that you’ve successfully installed Chat with RTX on your Windows PC, it’s time to take it out for a spin. Here are some examples of things you can do using Chat with RTX.
1. Chat with Smart AI
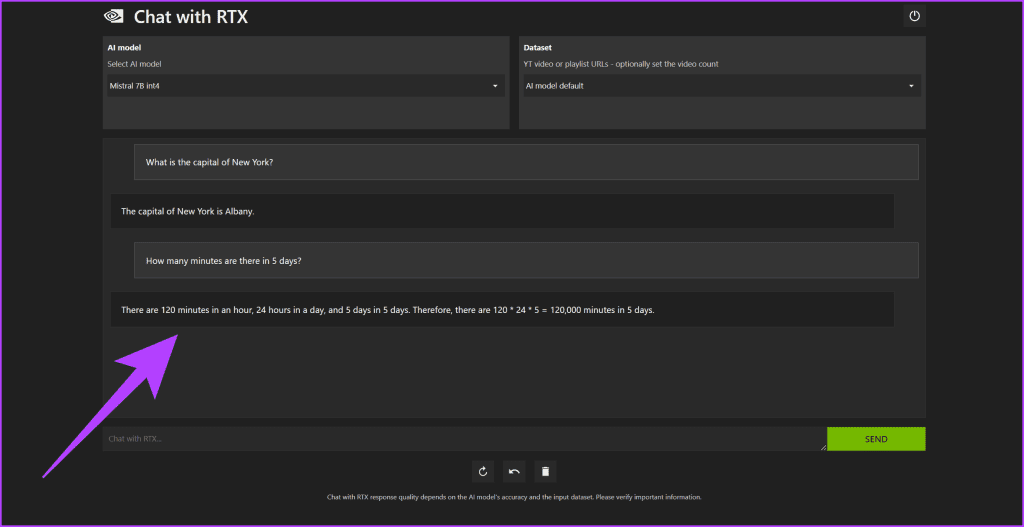
As with most AI tools, you can use Chat with RTX to chat with your local AI chatbot. Select the AI model of your choice and set the Dataset to ‘AI model default’.

Now, type your queries, and NVIDIA’s AI chatbot will respond to the best of its abilities.

However, it’s worth noting that since Chat with RTX works locally, it can’t give smart answers like Gemini or ChatGPT, which have internet access.
2. Analyze Your Notes
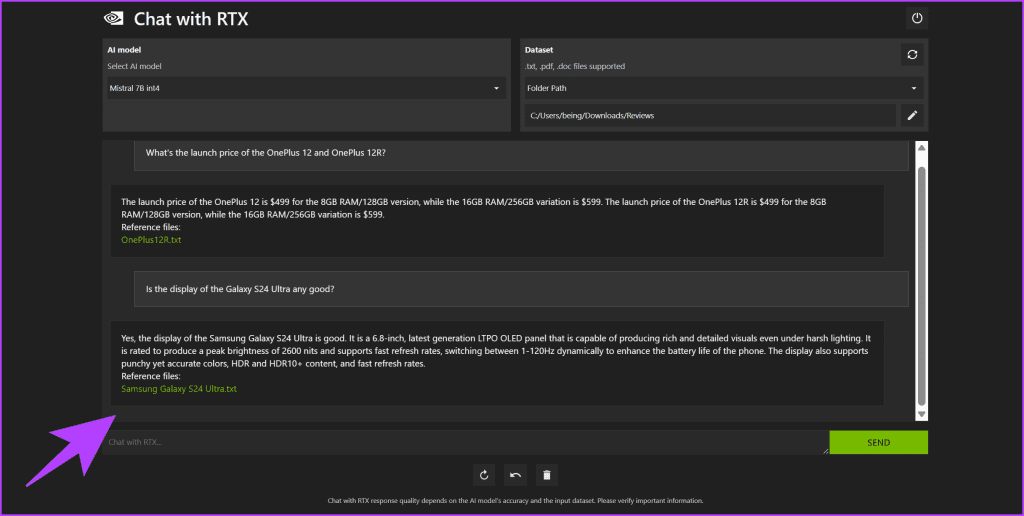
For most folks, the best way to use Chat with RTX is to analyze their documents. The one big issue with server-based AI tools is that you have to upload your confidential data onto their servers. On the flip side, for Chat with RTX, you can pinpoint it to your dataset, and it will then answer all your relevant queries. Here’s how to do that.
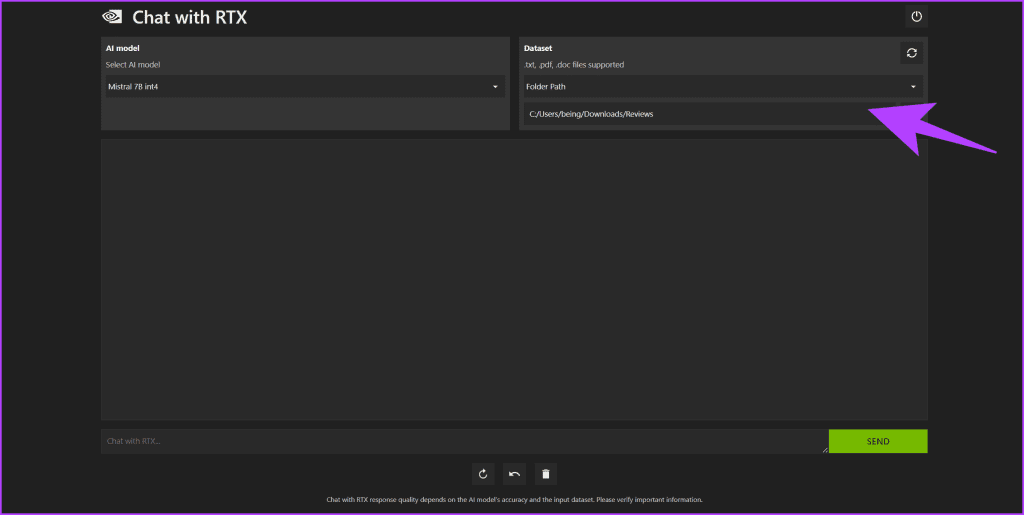
Step 1: Head to the Dataset section and set the source as ‘Folder Path’. Then, browse the folder path that contains all the files you wish the AI tool to analyze.
Note: Chat with RTX supports various formats, including text, PDF, DOC/DOCX, and XML.

Step 2: Once the Dataset has been loaded, enter your queries in the chat window. Based on the provided data, the AI tool will provide you with responses.

3. Feed YouTube Videos
Another way to use Chat with RTX is to analyze YouTube videos. If you quickly need something from a video file, you don’t have to go through the timeline searching for the answer to your queries. Instead, use Chat with RTX for the same.
Step 1: Under the Dataset section, select the source as ‘YouTube URL’. Then, paste the YouTube video URL you wish to search within. Finally, click on the ‘Download Transcripts’ button next to it.

Step 2: With the Dataset loaded, type your queries or prompts into the chat window and press Enter.

And that’s it. The AI will respond based on the YouTube video link you shared. That said, it’s worth noting that Chat with RTX essentially uses the Closed Captions (CC) file for the same. As such, the answers to your queries would largely depend on whether there’s a proper CC file for the video or whether YouTube has generated one on its own.
Enjoy Your On-Device AI
With Chat with RTX now installed and running on your Windows PC, you’re all set to explore the vast possibilities that on-device AI can offer. Whether it’s for productivity, learning, or casual conversation, Chat with RTX is ready for your needs. You can use it to summarize lengthy documents, brainstorm creative ideas, translate languages on the fly, or have a thought-provoking conversation.
So, go ahead, give it a shot, and enjoy the advantages of AI without sacrificing your privacy.
Thanks for your feedback!


